


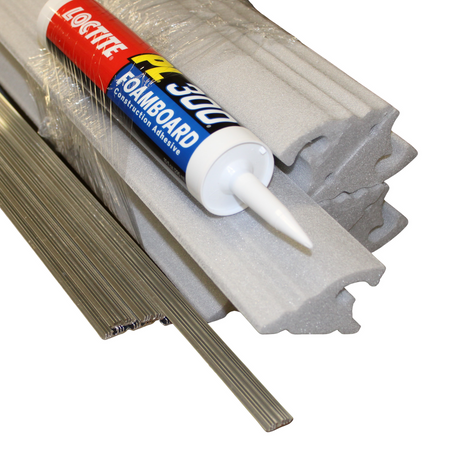
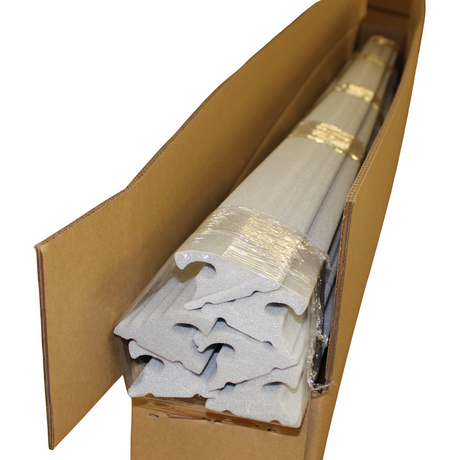
Wired4Signs USA offers LED foam crown molding cornices specifically designed to provide even indirect LED lighting, creating a beautiful ambiance in any interior. We also offer a range of crown moulding LED channels and LED strips to further enhance the lighting effect.
Our LED foam crown moulding is easy to install, and provides a stunning way to highlight any area, and add a touch of sophistication and elegance. With our range of mouldings, you can create a unique, eye-catching luxurious look that is sure to be admired.
What is Foam Crown Molding?
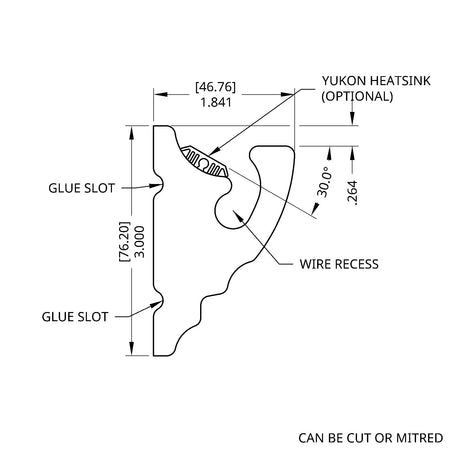
Foam crown molding is a great alternative to traditional wood crown molding for those who want a more cost-effective and easy-to-install solution. It is made of Styrofoam and is often made from architectural designs, allowing for a variety of looks and styles. Foam crown molding is also lightweight and can be easily installed with just a few simple tools. It is also paintable and can be easily customized to match any decor.
Additionally, foam crown molding is a great way to add a decorative touch to any room, without breaking the bank. With its many advantages, foam crown molding is a great way to add a touch of elegance to your home.
What are the benefits of foam crown molding?
- Foam crown molding is notably lightweight, making it easy to handle and install without requiring heavy-duty support structures.
- It is easy to install, even for DIY enthusiasts, due to the foam molding's manageable weight and flexibility.
- Resistant to decay and cracking, foam crown molding maintains its integrity and durability over time, ensuring long-lasting aesthetic appeal.
- Exhibiting resistance to insect damage and moisture, foam crown molding is well-suited for environments prone to such challenges, ensuring a prolonged lifespan.
- Compared to traditional materials, foam crown molding is a more budget-friendly option, providing an elegant finish without breaking the bank.
- Repainting in the future is hassle-free, as foam crown molding typically requires no primer needed, streamlining the maintenance process.
Crown molding for indirect lighting
If you're looking for a unique and beautiful design that will transform the appearance of your space, consider our collection of high-quality foam crown molding designed specifically for indirect lighting. Perfect for modern and contemporary interiors, these crown moldings feature a classic European design with a truly innovative and one-of-a-kind style, creating a warm and inviting atmosphere.
Our collection of crown molding is perfect for any room, allowing you to create a timeless and classic look with ease. They can change the way you think about crown molding, adding both beauty and functionality to your living space. With a wide selection of contemporary and modern designs, you’re sure to find the perfect crown molding to fit your home’s decor.
How to install foam crown molding?
Foam crown molding is a great way to add a decorative touch to any room. It is a relatively simple process to install and can be completed in a few hours. To install foam crown molding, follow these steps:
- Position and Mark the Alignment: Begin by holding a strip of molding in place above a door or window casing. Adjust the position until it looks even with the casing, then mark this alignment with a pencil. Start installation from an inside corner, working towards outside corners.
- Cut Angles for Corners: Use a miter box to cut the molding at a 45-degree angle for inside or outside corners. Ensure the correct parts are shorter based on the corner type.
- Ensure a Tight Fit: Utilize a rasp or sanding block to shave the back of the angled cut, allowing the corners to come together tightly.
- Apply Joint Compound and Install: Spread a ½-inch bead of joint compound along the molding's top and bottom edges. Install the molding using 8d nails to support long runs. Be cautious not to use too much compound to prevent sliding.
- Align Profiles for Inside Corners: Push the mitered ends together to create inside corners, ensuring the faces align. Use joint compound to fill any small gaps between the molding and the ceiling.
- Connect Outside Corners: Press the mitered ends together on outside corners, allowing excess compound to squeeze out. Backfill gaps using a finger or a putty knife.
- Secure Long Runs with Nails: For straight runs, push the straight-cut ends to create a butt joint. Use 8d nails to brace long runs and joints, angled slightly upward for concealment.
- Smooth Out Joints: Clear away excess joint compound while it's wet. Use your finger to smooth seams where the molding meets the wall and ceiling. A wet sponge aids in cleanup without removing too much compound.
- Fill Butt Joints Excessively: Push more compound into and over butt joints using a small putty knife. Leave the compound slightly proud of the joint, and once dry, sand away the excess.
- Prepare for Painting: Joint compound is easy to sand. Once it dries, sand the seams where molding meets molding with 150-grit sandpaper.
- Mask and Paint: Mask the walls along the edges of the molding with painter’s tape. Prime and paint the molding to match the room's door and window casings using an angled sash brush.
How to cut foam crown molding
Cutting foam crown molding is a relatively easy task as long as you have the right tools. Start by measuring the desired length and angle of the molding. You can then miter-cut the second piece at 45 degrees. Highlight the leading of the moulding with a pencil, then cut along it with a coping saw.
If you have access to a miter saw, then you can cut the crown molding at any angle you desire. The trick is to ensure that the miter saw is correctly adjusted before you start cutting. Put the crown molding in the saw and set the angle to the desired position. Make sure to keep the saw blade straight and cut along the leading of the molding. This will ensure that you get a clean and precise cut.
Frequently Asked Questions
Q: Can you put LED lights on crown molding?
A: Yes, you can add LED lights to crown molding, and it can be a fantastic way to enhance both the aesthetic and functionality of a space.
Q: Do I need LED strip channel when installing foam crown molding?
A: Yes, it is recommended to use LED strip channels when installing foam crown molding. These channels provide a secure and aesthetically pleasing way to conceal and protect the LED strips, ensuring a clean and professional finish. We offer a range of LED channels suitable for foam crown molding installations. Feel free to explore our options, and don't hesitate to contact us for assistance in choosing the right channel for your project.
Q: Is it a good idea to put crown molding in a bathroom?
A: Yes, installing crown molding in a bathroom can be a great idea and a positive design choice, provided that moisture-resistant materials are used to ensure durability in the unique environment of a bathroom.
Q: Is foam crown molding paintable?
A: Yes, foam crown molding is generally paintable, offering versatility in customization to match your desired color scheme or room decor.
Q: What is foam crown molding made of?
A: Foam crown molding is typically made from expanded polystyrene (EPS) foam or polyurethane foam.
