LED strip lights have quickly become a go-to solution for home, office, and commercial lighting projects. They are flexible, energy efficient, and capable of transforming ordinary spaces into visually striking environments. But the success of your installation depends on one critical factor: how you wire them. Wiring LED lights in series is one approach that can work in specific applications, but it requires careful planning and proper execution.
In this guide, you will learn how to wire LED lights in series, the components required, the pros and cons of this method, and troubleshooting tips to keep your project running smoothly. Whether you are wiring a small decorative setup or experimenting with larger applications, understanding this process will help you avoid common pitfalls and achieve consistent lighting results.
Understanding LED Strip Wiring Basics

Before diving into the steps, it helps to understand the fundamentals of LED strip wiring. Most LED strips are designed for low voltage, typically 12V or 24V, and require a power supply to convert mains electricity to safe operating levels. The way you wire the strips determines how electricity flows and how consistently the LEDs perform.
Series vs. Parallel Circuits
In a series connection, the current flows through each strip sequentially. The voltage is divided across the strips, meaning that as you add more strips, the voltage requirement increases. For example, when learning how to wire LEDs in series, it’s important to note that if one strip fails, the entire circuit can go dark.
By contrast, a parallel connection sends the same voltage to each strip directly from the power source. This keeps brightness consistent across long runs and is more commonly used in large installations. However, for compact projects where uniform current distribution is important, series wiring can still be practical.
Which Wiring Method Should You Choose?
Parallel wiring is typically the preferred choice for longer runs or installations where even brightness is essential. Series wiring, however, can be useful in controlled projects where you need precise current control. Knowing when to use each method is key to building a reliable system.
One factor you cannot overlook is the power source. For either wiring method, you need a properly matched power supply. Explore our full range of LED power supplies to find the right option for your project.
Key Components You’ll Need

To begin wiring LED strips in series, you’ll need a few essential components. Ensuring you have the right tools and materials will save time and prevent installation issues later.
- LED Strips: Verify that the strips are suitable for series wiring. Some are designed specifically for parallel connections.
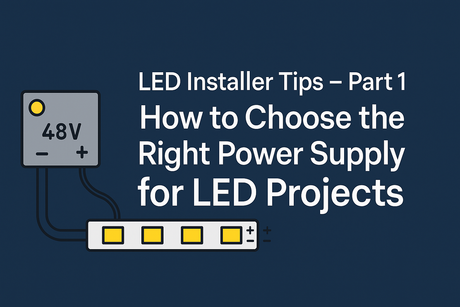
- Power Supply: Choose a unit that matches the total voltage requirement. For example, if you are learning how to wire 12-volt LED lights in series, ensure the supply delivers the correct cumulative voltage.
- Soldering Iron and Solder: The most reliable way to create durable electrical connections.
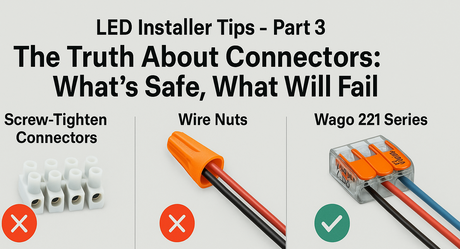
- LED Connectors: A convenient alternative if you prefer not to solder.
- Wire Strippers and Cutters: Essential for preparing connection points.
- Electrical Tape or Heat Shrink Tubing: Helps insulate and secure connections.
For professional results, consider using soldering techniques instead of relying solely on clip-on connectors.
Preparing Your Workspace
A safe and organized workspace is essential for any electrical project. Before you start wiring, take a few moments to prepare properly.
Safety First
- Always turn off the power supply before handling wires.
- Use insulated tools to reduce the risk of accidental shocks.
- Work in a dry, clean environment to avoid moisture-related hazards.
- Test each strip individually before installation to confirm functionality.
Organize Your Tools
- Lay out all components, strips, wires, connectors, and power supplies before beginning.
- Keep your workspace free from clutter to prevent mistakes.
- Use a multimeter to verify voltage levels before making final connections.
Step-by-Step Guide: How to Connect LED Lights in Series

Now, let’s look at how to connect LED lights in series with a simple process. Follow these steps carefully to achieve a reliable and functional setup:
Step 1: Measure and Cut
Measure the area where the strips will be installed and cut them to size at the designated copper contact points. Avoid cutting outside these points, as it can damage the strip.
Step 2: Prepare Connection Points
If soldering, apply a small amount of solder to the copper pads to “tin” them. If using connectors, ensure they are firmly clipped onto the contact pads to prevent loose connections.
Step 3: Wiring the Strips
Connect the positive terminal (+) of the first strip to the negative terminal (-) of the next. Repeat the process for all strips in the series chain. Once complete, connect the first strip’s positive terminal to the power supply’s positive output, and the last strip’s negative terminal to the supply’s negative output.
Step 4: Secure the Connections
Use electrical tape or heat shrink tubing to cover exposed joints. This prevents shorts and ensures a safe connection.
Step 5: Testing
Power on the system and check for uniform brightness across all strips. If you notice dimming or flickering, check your connections and verify that your power supply provides the correct voltage and current.
Troubleshooting Common Issues
Even with careful preparation, problems can occur when wiring LED lights in series. Below are the most common issues and how to fix them:
LED Strip Not Lighting Up
- Check that all connections are secure and that polarity is correct.
- Inspect the power supply to ensure it is delivering the required voltage.
- Test each strip individually to isolate any faulty section.
Uneven Brightness or Flickering
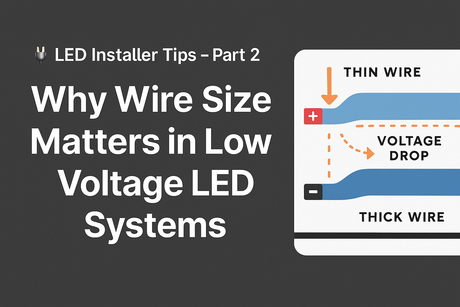
- Voltage drop is the most common cause of uneven lighting in series wiring. Consider using a higher-capacity power supply or thicker wires to reduce resistance.
- Make sure solder joints and connectors are properly secured.
- For projects with long runs, consider switching to a parallel setup for more reliable performance.
For more details about power stability and compatibility, see our guide on LED power supplies and drivers.
Tips for Longer LED Strip Runs

Series wiring is best suited for short to medium runs. If you plan on using longer lengths, keep these tips in mind to avoid voltage and brightness issues:
Minimize Voltage Drop
Use thicker gauge wires to carry current over longer distances. A higher-quality power supply also ensures that the strips receive consistent voltage.
Plan for Expansion
If you anticipate adding more strips in the future, select a power supply with additional wattage capacity. This prevents overloads and protects your investment.
Consider Amplifiers
When wiring very long runs, you may need to use signal amplifiers to maintain brightness. Instead of extending your series indefinitely, plan strategically for reliable results.
When to Use Series Wiring vs Parallel
Although parallel wiring is more common, there are scenarios where series wiring can be beneficial. Knowing the differences will help you choose the best method for your project:
- Series Wiring: Ideal for small, controlled projects or where current uniformity is desired. It’s also useful for learning how to wire 12-volt LED lights in series for educational or experimental setups.
- Parallel Wiring: Recommended for large installations, commercial projects, or any situation where long runs of LED strips are required. Parallel ensures consistent brightness and reduces strain on each strip.
Many advanced installations use a combination of both methods. For example, you might wire small groups in series and then connect those groups in parallel to balance efficiency and reliability.
Practical Applications of Series Wiring
Although series wiring is not always the most common method, it has some unique applications where it can be effective:
- Accent Lighting: Small decorative features, such as shelving or display cabinets, where only a few strips are needed.
- DIY Projects: Educational kits or hobby builds that demonstrate how to wire LEDs in series as a learning exercise.
- Low-Voltage Installations: Battery-powered projects that rely on precise current control.
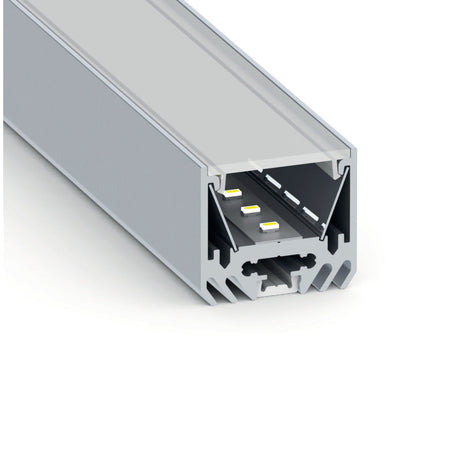
For commercial and high-demand environments, a parallel setup combined with quality mounting accessories often provides the best long-term results. Explore our LED Channels to create professional-grade finishes that improve both safety and style.
FAQs: Wiring LED Lights in Series
Can all LED strips be wired in series?
Not every LED strip is compatible with series wiring. Most are designed for parallel connections to prevent voltage drop. Always check product specifications first.
Why are my LED strips dimming at the far end?
This usually indicates a voltage drop. Solutions include upgrading your power supply, shortening the run, or switching to parallel wiring.
Is soldering necessary?
While not strictly required, soldering provides the most secure and reliable connections. If you prefer a tool-free approach, use high-quality solderless connectors.
How do I know the correct power supply size?
Add up the total wattage of all connected strips and choose a power supply that can handle at least 20 percent more than the total draw. This ensures stable performance.
Can I mix series and parallel wiring?
Yes, some advanced projects use a hybrid method to optimize current distribution and reduce voltage drop. However, careful planning is essential to avoid overloading the system.
Conclusion
Learning how to wire LED lights in series is a valuable skill for DIYers and professionals alike. While series wiring has its limitations, it can be a practical solution for certain low-voltage, short-run projects. The key is to plan carefully, use the right tools, and select a compatible power supply that matches your project’s requirements.
If you want brighter, longer, and more reliable results, parallel wiring may be a better choice. Whichever method you choose, following proper wiring practices will help ensure your LED strip installation performs well and lasts for years.
For expert advice, custom solutions, and premium components, contact our team at Wired4Signs USA. We are here to help you create lighting projects that are not only functional but also visually impressive.


