Ready to transform your space with LED strip lights? These sleek, energy-efficient lighting solutions are ideal for enhancing ambience, improving visibility, and creating custom lighting effects in any room or outdoor area. Whether you're upgrading kitchen cabinets, setting up entertainment spaces, or lighting up patios, this complete guide on how to install LED strip lights will walk you through every step for a professional-looking finish.

Why Use LED Strip Lights?
LED strip lighting has exploded in popularity for good reason. These flexible, low-profile lights offer a brilliant blend of style and function. They consume minimal power while producing excellent light output, making them ideal for residential and commercial projects alike. Whether you are installing LED strip lights in your home or for a business, the benefits are hard to ignore.
- Low power consumption with high lumen output: Save energy without sacrificing brightness. Perfect for decorative or task lighting in kitchens, offices, and retail spaces.
- Flexible design: Bend them around corners, curve them along arches, or install them in tight spots where traditional lights won’t fit.
- Variety of options: Choose from different color temperatures, brightness levels, and IP ratings for indoor and outdoor use.
- Simple installation: Most strips come with a peel-and-stick adhesive backing, making LED strip light installation quick and tool-free.
What You’ll Need for Installation
Before learning exactly how to set up LED strip lights, make sure you have the right tools and accessories ready. A well-prepared kit ensures your project goes smoothly from start to finish.
- LED strip lights – choose the correct length, voltage, and IP rating for your project
- LED power supply – match the wattage to your strip length
- Measuring tape and a sharp cutting tool for accuracy
- Adhesive backing or mounting clips, depending on your surface
- Cleaning cloth or alcohol wipes to prep surfaces
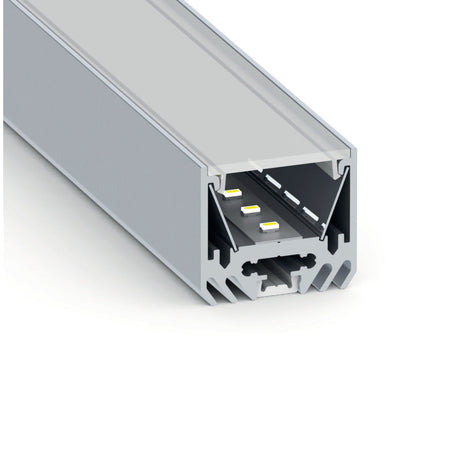
- LED channels for a professional, long-lasting finish
- Solderless connectors for easy linking and turning
- Wire strippers and electrical tape if manual wiring is needed
- Optional: Dimmer switches or smart controllers for customization

Step 1: Plan Your Layout
Start by mapping out where the LED strips will be placed. This planning stage is essential when learning how to install LED light strips effectively. Consider the overall lighting effect, access to power sources, and how visible your wiring will be. Will the strips accent the underside of kitchen cabinets, provide a soft glow behind your TV, or outline a ceiling recess? The more detailed your layout, the smoother the installation will be.
Popular Placement Ideas
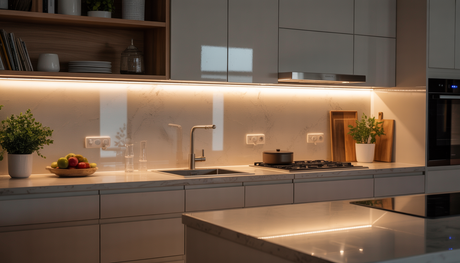
- Under cabinets: Illuminate kitchen counters or workspaces with precision
- Behind screens: Add soft backlighting behind monitors or TVs for an immersive viewing experience
- Bathroom mirrors: Create a spa-like atmosphere with perimeter glow
- Staircases: Combine safety and elegance with subtle illumination along each step
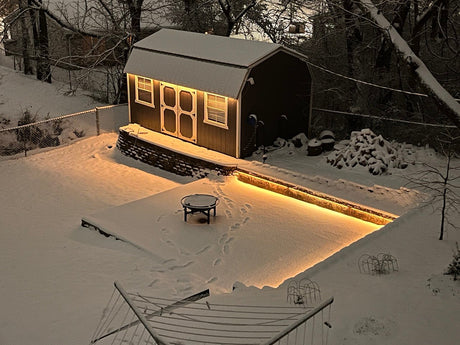
- Outdoor features: Add definition and ambience to garden pathways, decks, and pergolas
Step 2: Clean and Prep the Surface
Once your layout is ready, it’s time to prep the surface. A clean surface is key to successful LED strip light installation. Wipe down the area using alcohol wipes or a lint-free cloth to remove dust, oils, or debris. This step helps the adhesive backing stick firmly to the surface. Let everything dry completely before applying the strips. If the surface is uneven or textured, consider using mounting clips or LED channels for extra grip and durability.

Step 3: Cut LED Strips to Fit
One of the benefits of learning how to install LED strip lights is being able to customize lengths. LED strips can be trimmed, but only at marked cutting points indicated by copper pads or scissor icons. Use sharp scissors or a precision knife to make clean cuts. Cutting in the wrong place can damage the strip. If you’re splitting strips across different areas, label each segment to stay organised during installation.
Step 4: Mount the Strips
- Peel off the adhesive backing on the LED strip and press it gently into place along your planned layout.
- Apply firm, even pressure for a long-lasting hold, especially on curves or corners.
- If you’re using mounting clips or LED channels, install them first before placing the strip.

Step 5: Connect to Power and Controller
- Double-check the voltage rating of your LED strips and power supply before connecting them. Most strips are 12V or 24V, but some high-output options use 48V.
- Match the polarity of the wires correctly — positive to positive, negative to negative — to prevent issues.
- If you’re using multiple strip segments, connect them with solderless connectors or secure wiring methods.
- Protect connections with electrical tape or wire nuts to avoid accidental disconnection or moisture damage.
Step 6: Test and Troubleshoot
- Turn on the lights and check that the entire strip illuminates evenly.
- If certain sections don’t light, inspect connectors for reversed polarity or loose joins.
- If you see dimming at the far end of a run, you may have voltage drop. This is common in longer runs and can be fixed by shortening lengths, adding amplifiers, or wiring in parallel.
Testing before final placement is an important step in installing LED strip lights successfully, especially in hard-to-reach areas.
Advanced Tips for Custom Installs
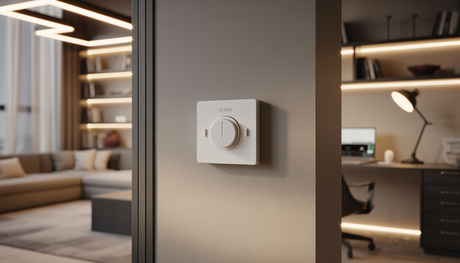
- Dim your lights: Install a dimmer switch or smart controller for adjustable brightness.
- Choose RGB or RGBW: RGB strips provide a wide range of colors, while RGBW adds a dedicated white LED for truer white tones.
- Manage heat: Use aluminium LED channels to dissipate heat and extend the lifespan of your strips.
Frequently Asked Questions
Can I install strips on curved surfaces?
Yes, flexible LED strips work perfectly for curves. Use strong adhesive or mounting profiles for stability.
Are waterproof options available?
Yes. Look for IP65 for splash resistance or IP67 and above for full waterproofing in bathrooms, gardens, or boats.
How can I avoid voltage drop?
Use quality power supplies, limit run lengths, and wire in parallel to maintain brightness.
What is the easiest way to connect strips?
Solderless connectors make LED strip light installation fast and tool-free — ideal for beginners.
Need Help Choosing Your Strip Lighting Setup?
Whether you’re a DIYer learning how to install LED light strips for the first time or upgrading a commercial project, we can help. Contact us with your project details, and our team will recommend the best solutions for your layout, style, and budget.