Thinking about installing recessed LED floor lighting? You’re not alone. Many homeowners and designers love the sleek, flush-mounted look. It enhances a space without adding visual clutter. But getting it right can be tricky.
Choosing the wrong lighting setup can cause uneven brightness and exposed wires. It can even create safety hazards. A poorly planned installation leads to wasted money and frustrating rework. Worst of all, the final result might not look good.
But don’t worry. This guide walks you through every step to ensure a seamless, professional finish. You’ll learn how to choose the right components, prepare your floor, and install everything properly. Soon, you’ll enjoy beautiful and durable recessed LED lighting.
Table of Contents
Choosing the Right LED Lighting System

The key to a successful installation starts with choosing the right products. Not all LED strips or channels are the same. Picking the wrong one can cause overheating, flickering lights, or a setup that won’t last.
LED Strip Options
Waterproof vs. Standard:
Installing LEDs in a kitchen, bathroom, or outdoor space? Choose waterproof strips. They resist spills, humidity, and dust, making them more durable.
Standard strips work well in dry, low-traffic areas where moisture isn’t a concern.
Brightness and Color Temperature:
Warm white (2700K-3000K) creates a cozy glow, perfect for living rooms and bedrooms. Cool white (4000K-6000K) gives a crisp, modern look, ideal for kitchens and offices.
Check the lumens—higher means brighter, lower creates a softer feel.
RGB or Tunable White:
RGB strips let you switch colors, great for mood lighting. Tunable white lets you adjust between warm and cool tones for flexibility. Some options sync with smart home systems for easy control.
Planning and Preparing Your Floor

Before cutting into your floor, take time to plan. A rushed installation can lead to uneven lighting, misaligned channels, or even damage to your flooring. Careful preparation ensures a professional, long-lasting result.
Mapping Out Placement
Decide where you need lighting. Are you outlining a hallway? Creating a soft glow around furniture? Highlighting a feature wall?
Make sure the spacing is even. Uneven gaps can cause dark spots, while lights placed too close together may be too bright. Test different placements using temporary tape or a laser guide before making permanent cuts.
See all floor lighting channels.
Floor Material Considerations
Each type of flooring requires a different approach:
Wood:
Easy to cut, but you must seal the edges to prevent moisture damage and warping. Use a router for precise channels. Choose a sealant that matches your flooring finish for a seamless look.
Tile:
Requires a diamond-tipped saw to avoid cracking. Cut slowly to prevent chipping, and use a wet saw for best results. Apply masking tape over the cut line to minimize breakage.
Concrete:
Best done during construction or renovation. Cutting set concrete is difficult and requires a concrete saw with a dust extraction system. Plan wiring and conduit placement beforehand to avoid costly modifications later.
The Klus HR-Max is a great channel for concrete surfaces.
[product=indoor-outdoor-driveway-lighting-channel-system-model-klus-hr-max|variants=Silver / 2m (78"),Silver / 1m (39"),Silver / 609mm (24"),Silver / 6" Sample]
[/product]
Vinyl or Laminate:
These materials are thin and prone to chipping. Use a sharp blade and router carefully to prevent damage. Test on a scrap piece first to ensure a clean cut without tearing.
Preparing for Installation
Proper preparation is key to a smooth and professional installation. Skipping this step can lead to misalignment, uneven lighting, or costly mistakes.
Marking and Measuring: Use painter’s tape or a chalk line to mark where the LED channels will go. Measure multiple times to ensure accuracy. Even a slight misalignment can make your lighting look uneven.
For straight lines, use a laser level to guide your markings. If your design includes curves, consider flexible LED channels and use a template to keep the shape consistent.
Testing Before Cutting: Before making any permanent cuts, test your LED strips in place. Lay them along the marked channels and turn them on. This allows you to check brightness, color consistency, and alignment.
If you're using dimmable or smart-controlled LEDs, test the controls as well. Make sure there are no flickering issues or dead spots. Adjust placements if necessary before finalizing your cuts.
Preparing Your Tools: Have the right tools ready for smooth installation. Depending on your flooring type, you may need: A router or circular saw for wood and laminate; a diamond-tipped saw for tile or stone; a concrete saw for cutting into set concrete; and a vacuum or dust extractor to keep your workspace clean.
Double-check that all your tools are sharp and in good condition. Dull blades can cause rough, uneven cuts.
Taking the time to plan and test everything in advance will save you headaches later. A well-prepared installation leads to a polished, professional result.
Installing the LED Channels and Wiring

Now it’s time to install your aluminum channels and set up the wiring. A clean, secure installation ensures durability and a polished look.
Securing the Aluminum Channels
The channels should sit flush with the floor for a seamless finish. Use adhesive or screws for wood and laminate. For tile, epoxy works best. Concrete requires anchors or strong adhesive.
Check for gaps after securing the channels. Fill uneven spots with sealant to keep everything level. This prevents shifting and ensures smooth lighting.
Running Wires Safely
Concealed wiring improves both safety and aesthetics. For wood and laminate, route wires underneath. If working with concrete, pre-planned conduits make wiring easier. If no conduits are available, use low-profile cable raceways.
Before securing everything, test the power supply, dimmers, and controls. Fixing issues now saves time later.
Waterproofing and Protection
For bathrooms, kitchens, or entryways, waterproofing is key. Apply silicone around channel edges to block moisture. If your LED strips aren’t waterproof, add a protective coating.
[product=permatex-rtv-silicone-adhesive]
[/product]
In high-traffic areas, use LED channels with sturdy diffusers. This shields the lights from dirt, dust, and impact, keeping your setup looking great for years.
Mounting the LED Strips and Testing the Setup
With the channels in place, it's time to install the LED strips and ensure everything works properly.
Attaching LED Strips Securely
Use high-quality adhesive backing or mounting clips to keep the strips in place. If the adhesive isn’t strong enough, reinforce it with double-sided tape or silicone glue.
Weak adhesion can lead to sagging over time, affecting both appearance and functionality.
Connecting to the Power Source
Before turning on your lights, double-check all wiring. Loose connections can cause flickering or uneven brightness.
For longer runs (10m+), watch for voltage drop. If the far end of the strip looks dimmer, inject power at both ends or use a thicker gauge wire to maintain brightness.
Final Checks Before Sealing Everything
Test the entire setup before sealing the channels. Check brightness, color consistency, and smart controls (if installed). Adjust any misalignments now to avoid rework later.
Once everything looks perfect, secure the covers and seal the channels for a clean, professional finish.
Enhancements and Final Touches

With your LED floor lighting installed, it’s time for upgrades that improve both function and aesthetics. Small changes can make a big difference in the final look.
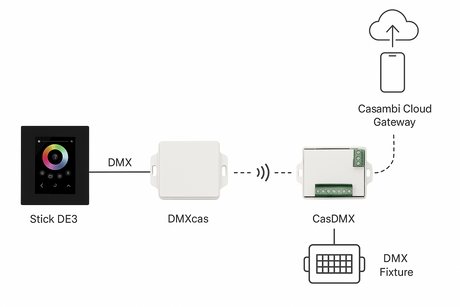
Smart Home Integration
Sync your lights with voice assistants or smartphone apps for hands-free control. Automate brightness adjustments based on time of day to enhance convenience and save energy. Customizable lighting schedules can also improve comfort and security.
Choosing Diffusers
A diffuser softens the light for a smooth, uniform glow. Without one, individual LED dots may be visible, creating a harsh look. The right diffuser can also help reduce glare and eye strain.
Combining with Other Lighting Elements
For a well-balanced space, coordinate your floor lighting with wall sconces, ceiling lights, or under-cabinet lighting. A layered lighting design improves both ambiance and functionality. Mixing warm and cool tones can add depth and character to the space.
Conclusion
Recessed LED floor lighting may seem complex, but with careful planning and the right materials, you can achieve a seamless, high-end result.
A well-executed installation not only enhances aesthetics but also improves safety, functionality, and overall ambiance.
Using high-quality LED strips, durable aluminum channels, and smart controls ensures longevity and a polished finish. Investing in the right components prevents common issues like flickering, uneven brightness, or premature wear.
With a thoughtfully designed setup, your space will feel more modern, inviting, and effortlessly illuminated for years to come.
FAQs on Installing Recessed LED Lighting in Your Floor
Can you put LED lights on the floor?
Yes, you can install recessed LED lighting in your floor for a sleek, modern look. Using aluminum channels helps protect the lights and ensures durability.
Do LED floor lamps use a lot of electricity?
No, LED floor lamps are energy-efficient and consume far less electricity than traditional bulbs. They provide bright lighting while keeping energy costs low.
How do you install recessed LED lighting in the floor?
You’ll need to cut channels into the floor, secure aluminum LED channels, run concealed wiring, and attach LED strips. Proper planning and sealing ensure a seamless and long-lasting installation.
Are recessed LED floor lights waterproof?
Some are, but not all. If installing in moisture-prone areas like bathrooms or entryways, choose waterproof LED strips and seal the channels with silicone for extra protection.
Can I control recessed LED floor lights with a smart system?
Yes, many LED strips are compatible with smart home systems. You can control brightness, color, and schedules through a smartphone app or voice assistant.
