Joining LED strip lights is a simple but essential skill if you want to extend your lighting design without visible gaps or inconsistencies. Whether you are creating a dramatic effect in your living room, adding task lighting in a kitchen, or building outdoor accent lighting, knowing how to connect LED strip lights securely ensures reliability and brightness across the whole installation. This guide will cover different methods, tools, and troubleshooting tips for both beginners and professionals who want to achieve seamless illumination.
Why You Might Need to Connect LED Strip Lights Together
LED strip lights are sold in reels of specific lengths, usually five meters or less. While that might be sufficient for smaller projects, many designs require longer runs or the ability to turn corners. This is where learning how to connect LED strip lights together becomes necessary. By joining strips correctly, you can:
- Create uninterrupted illumination across cabinets, ceilings, or display shelves
- Extend strips to cover long architectural features or outdoor installations
- Link LED light strips at angles without breaking the design flow
- Reduce shadows or dark gaps between lighting segments
Applications range from simple home upgrades to professional commercial lighting systems, and the joining method you choose will depend on whether the project is temporary, decorative, or permanent.
Tools and Materials You’ll Need
Before starting, gather the right tools and materials for the job. Having the proper equipment not only makes installation easier but also ensures the connections are safe and long-lasting.
- LED strip lights
- Power supply compatible with your strip voltage
- LED strip connectors (clip-on or fold-over)
- Wire connectors for bridging soldered joints
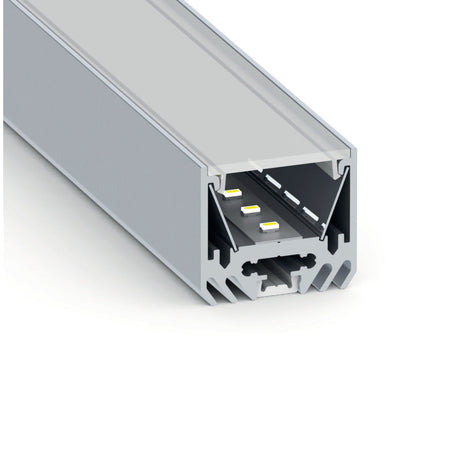
- LED mounting channels for a polished and secure finish
- Wire strippers, scissors, or a cutting tool
- Soldering iron and heat shrink tubing (for permanent joins)
- Cleaning supplies, such as alcohol wipes, are needed to prepare the surface
Depending on your project, you might not need every item. For example, a short indoor run may only require connectors, while outdoor installations benefit from soldering and waterproofing.
How To Connect LED Strip Lights Together
There are several methods for joining strips, ranging from simple plug-and-play connectors to professional soldering techniques. Let’s go through each one step by step.
Step 1 – Identify Cutting Points
Every LED strip has small copper pads marked along its length. These pads indicate safe cutting zones. Cutting outside these marks can damage the circuit, leaving part of the strip unusable. Always make sure to measure your installation area first and cut only at the designated points.
Step 2 – Match Polarity
On each copper pad, you’ll see positive (+) and negative (−) markings. When connecting strips, align these correctly to avoid reversed polarity, which can prevent the lights from working or even damage the LEDs. Double-check the markings before making a join.
Step 3 – Use a Connector for Quick Joins
Connectors are the easiest way for beginners to learn how to join LED strip lights. These small clips come in different types, but the process is similar:
- Open the connector and insert each strip so the copper pads align with the metal pins.
- Close the connector firmly to lock the pads in place.
- Attach power and test to make sure the strip lights up evenly without flickering.
This method is ideal for temporary setups or when you want to avoid soldering. However, it may not be as durable in environments with vibration or moisture.
Step 4 – Soldering for a Permanent Join
For long-term reliability, soldering is the preferred method. This is especially useful for outdoor projects or professional installations where durability is essential.
- Gently scrape away any protective coating on the copper pads.
- Tin each pad by applying a small amount of solder to improve conductivity.
- Solder wires or strip ends directly to the pads, matching positive to positive and negative to negative.
- Slide heat shrink tubing over the joint and apply heat to seal it, protecting against moisture and short circuits.
Soldering requires more tools and skill, but the result is a strong, long-lasting electrical connection.
How To Connect Two LED Strips Without Connectors
Sometimes you may not have connectors available, or you might want to avoid them for aesthetic reasons. In this case, soldering wires directly between two strips is the best approach. It is also the answer to the common question of how to connect two LED strips without connectors.
Steps include cutting the strips at their copper pads, preparing the pads with solder, and then attaching short bridging wires between the two strips. Once joined, insulate the connection with heat shrink tubing. While this takes longer than clipping, it creates a neat join and reduces the chances of failure in demanding environments.
If you are new to soldering, you can also use wire connectors as an alternative method, though they are bulkier and less seamless than direct soldering.
How To Link LED Light Strips for Large Projects
For larger installations, such as retail displays, architectural lighting, or long hallways, simply joining strips together may not be enough. Voltage drop is a common issue where lights near the power supply glow brightly, but those farther away appear dimmer.
To prevent this, you should:
- Use a power supply with sufficient capacity for the total wattage of your strips
- Inject power at multiple points in long runs
- Use amplifiers or repeaters for RGB strips to maintain color accuracy
Choosing the correct LED power supply is crucial. Undersized supplies cause flickering and premature failure, while oversized ones improve stability and lifespan.
Clipping vs Soldering: Which Method Should You Choose?
When deciding how to connect LED strip lights, the choice between clipping and soldering depends on your project type and experience level.
- Clipping: Perfect for DIY beginners and short-term applications. Clip connectors are fast and tool-free but may loosen over time if moved frequently or exposed to humidity.
- Soldering: Ideal for professional or permanent installations. It requires more tools and skill but results in stronger, neater, and more reliable connections that can withstand demanding conditions.
If your project involves outdoor areas or will remain installed for many years, soldering is the recommended method. For temporary displays or quick upgrades, clip connectors will save time and effort.
Step-by-Step Installation Guide
Once you know how to join LED strip lights, the next step is proper installation. A well-planned layout prevents wasted material and ensures an even glow throughout the space.
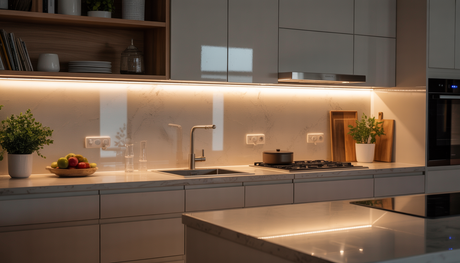
- Choose a location: Decide where the strips will go, such as under cabinets, behind a TV, or around a ceiling cove. Consider how the light will enhance both ambience and functionality.
- Clean the surface: Use alcohol wipes or a clean cloth to remove dust and grease. Adhesive will not bond well to dirty or uneven surfaces.
- Mount the strips: Peel back the adhesive and press the strips firmly in place. For a more polished finish and better heat dissipation, use LED mounting channels.
- Connect to power: Attach the strips to the power supply, ensuring polarity is correct. Use solderless connectors or soldered joins, depending on your chosen method.
- Test the system: Power up the installation to confirm even illumination. If sections fail to light up, check for loose or reversed connections.
Troubleshooting Common Problems
Even with careful planning, issues may occur. Here’s how to solve the most common problems when learning how to join LED strip lights.
Flickering Lights
This usually indicates a loose connection or insufficient power supply. Reseat connectors, re-solder joints if necessary, and verify that the power supply matches the strip’s voltage and wattage needs.
Uneven Brightness
If some sections look dimmer, it may be due to a voltage drop over long runs. To fix this, inject power at multiple points or divide the installation into shorter circuits. This is particularly important when you connect LED strip lights together over large areas.
Non-Functioning Sections
Check the copper pads where you cut the strip. If they are damaged, re-cut at the next marked point and rejoin. For soldered connections, inspect the joint and reapply solder if necessary. Using wire connectors can help in quick fixes without needing to re-solder.
Frequently Asked Questions
How to connect two LED strips without connectors?
You can solder the copper pads directly and use short wire bridges. This provides a durable solution but requires basic soldering skills.
Can I join different types of LED strips?
Yes, but they must share the same voltage and be compatible with the same power supply. Mismatched types may cause uneven color or brightness.
What is the maximum length of LED strips I can connect?
This depends on the voltage and power supply. Exceeding the recommended length may lead to a voltage drop. Always check the manufacturer’s limits and consider amplifiers or multiple power feeds for very long runs.
Are soldered connections better than clip-on connectors?
Soldered joins are stronger and more permanent. Clip-on connectors are more convenient but may loosen over time, especially in high-humidity environments.
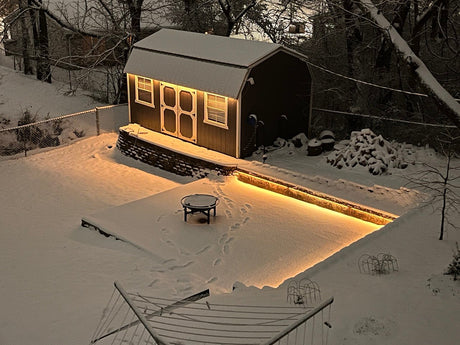
Can I link LED light strips outdoors?
Yes, but use waterproof-rated strips and connectors with proper sealing. Applying heat-shrink tubing or waterproof adhesive ensures durability in outdoor settings.
Best Practices for Long-Lasting Results
- Always match the voltage of your strips with the power supply
- Use high-quality connectors or solder joints for stability
- Install strips in aluminum channels to improve cooling and lifespan
- Test your connections before permanently mounting strips
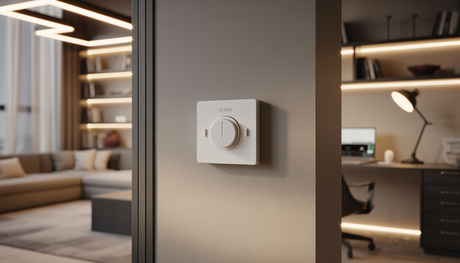
- Use dimmers or smart controllers for added flexibility and energy savings
Conclusion: Create Seamless LED Lighting Connections
Learning how to join LED strip lights correctly ensures that your projects look professional and last for years. Whether you prefer the ease of connectors or the durability of soldering, both methods can deliver excellent results when done properly. Always double-check polarity, use the right power supply, and prepare your surfaces carefully. With these steps, you can link LED light strips into a continuous system that enhances any space, indoors or outdoors.
Need help choosing the right accessories for your project? Contact our team for guidance on power supplies, connectors, or custom solutions tailored to your installation.