Sitting at a desk for long sessions with poor lighting can strain your eyes and slow your focus. Overhead fixtures often cast harsh shadows and traditional desk lamps take up space and add clutter. Recessed LED strip lights on desk surfaces give you bright, even illumination without the mess. This guide explains how recessed lighting works, why it is superior to surface setups, and how to plan a clean installation that looks professional and performs well.
Understanding Recessed LED Desk Lighting
Recessed lighting means you carve a shallow channel into the desk and install the light source flush with the surface. The result is a sleek line of light that hides hardware while delivering uniform brightness. You can recess along front edges for task lighting, under rear edges for a wall wash effect, or in center channels to highlight a work zone. Compared to surface mounted tape, recessed lights are less prone to snagging sleeves and cables, and they look purpose built.
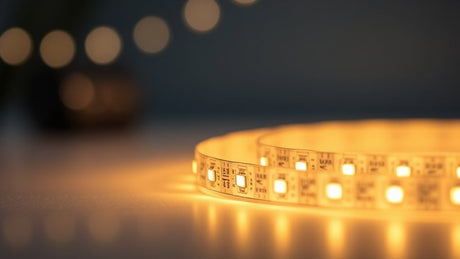
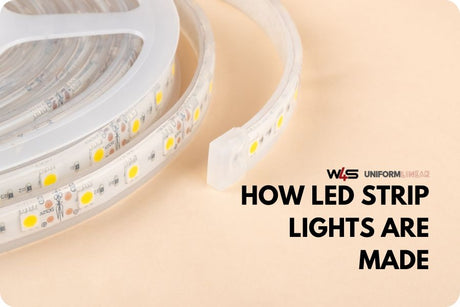
LED strips are the ideal engine for recessed projects because they are flexible, low profile, and easy to size. Modern strips offer high lumen output, tight color consistency, and smooth dimming. If your goal is a cleaner workspace and better visibility, led strips on desk in a recessed profile will outperform clamp lamps and bulky fixtures with less glare and less clutter.
Benefits of Using LED Strip Lights on a Desk
- Better ergonomics and comfort: The light originates close to the work surface, which reduces shadows and eye strain. Even illumination across your keyboard and documents helps you concentrate longer.
- More usable space: Recessed strips keep the desktop clear. No lamp bases, no cords crossing your work zone, and no wobble when you bump the table.
- Polished design: Flush lighting lines give furniture a modern, custom look. You can match the length and position to your exact desk layout.
- Customization: Choose warm white for a relaxed mood or cool white for focus. Add RGB or RGBW if you want ambient color for gaming or creative work.
- Efficiency and longevity: Quality strips deliver high output at low power and run cool when paired with a suitable profile, which supports long service life.
When you need a starting point for selecting components, browse our range of LED strip lights to compare brightness levels, color options, and voltages suitable for furniture projects.
Planning Your Recessed LED Desk Lighting Project
Define the goal before you cut a single groove. Decide if you want bright task lighting across your primary work area, ambient glow that frames the desk, or a wall wash behind monitors to soften contrast. Each goal changes strip placement, channel depth, and power routing.
Placement ideas that work well:
- Front edge task line: A narrow channel near the front edge creates a bright band that illuminates the keyboard and notebook without glare.
- Rear edge wall wash: A channel along the back edge throws light onto the wall to reduce eye strain when using one or more monitors.
- Underside perimeter: A concealed strip under the desk creates a floating effect and gentle footwell illumination.
- In surface highlight: A central recessed line can define a drawing or writing zone for focused work.
Check your material: Solid wood, plywood, and MDF are ideal for routing channels. Veneered panels can also work with careful depth control. Metal and glass require alternative mounting strategies and are better suited to surface profiles mounted under edges rather than in surface recesses.
Choosing the Right LED Strips for Desk Installations
Selecting the right light source is the most important decision you will make. Match output, color, and control to the way you use your workspace, then confirm that the strip and profile fit the recess you plan to cut.
Brightness and lumen target: For task work, aim for a bright, even field across the desk. Mid to high density strips create a smooth line of light with fewer visible points. For ambient glow, a moderate-density strip is usually enough.
Color temperature: Warm white creates a calm atmosphere for reading and evening work. Neutral to cool white supports focus when analyzing documents or editing photos. If you want both, choose a tunable white strip and pair it with a suitable controller.
RGB or RGBW: For gaming or creative environments, color makes a setup feel personal. RGB gives you dynamic effects. RGBW adds a dedicated white channel for clean task lighting when you need it.
Voltage and run length: Most desks work well with 12-volt or 24-volt strips. Longer runs benefit from a 24-volt system to reduce voltage drop. Keep power leads short and consider feeding both ends on very long lines to maintain even brightness.
Protection level: For coffee-prone work areas, consider a coated strip. A light protective coating helps with cleaning while still fitting in a shallow channel.

Tools & Materials Needed
Before you start carving channels into your desk, gather the right tools and materials. Using quality components will not only make installation smoother but also extend the life of your lighting setup.
- Router or chisel: For creating clean, consistent recesses in wood, MDF, or plywood desks.
- Measuring tape and pencil: For accurate marking before you cut.
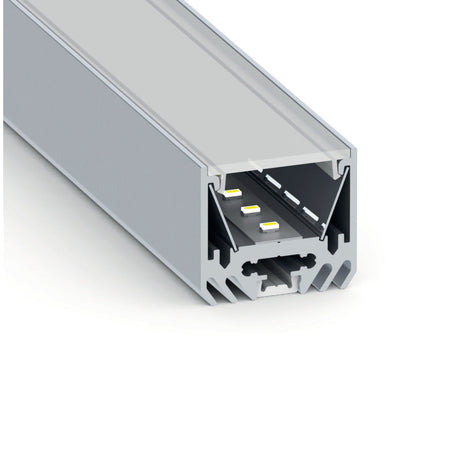
- Adhesive backing or aluminum profiles: Profiles help with heat dissipation and create a professional finish. Browse our LED mounting channels for options that fit desk applications.
- Wire connectors, dimmers, and smart controllers: These let you control brightness and color without rewiring later.
- Power supply options: Choose between USB-powered for portability, plug-in adapters for simplicity, or hardwired setups for a permanent installation. See our range of LED power supplies.
Step-by-Step Installation Guide
Step 1: Mark & Measure
Determine the exact placement for your LED strips. Measure the channel length you need and plan where your power supply will sit. Ensure you leave enough clearance for connectors and any bends in the strip.
Step 2: Create the Recess
Use a router to cut a channel along your marked lines. The depth should allow the LED strip to sit flush with or slightly below the desk surface. Keep the cut straight and consistent for a professional look.
Step 3: Mount LED Strips
If your strips have adhesive backing, peel and stick them directly into the channel. For extra security and better heat management, use mounting profiles or clips. Always test-fit the strip before committing to final placement.
Step 4: Conceal Wiring
Drill small holes at the ends of channels to feed wires through to the underside of the desk. Use cable channels or sleeves to keep wires hidden and prevent tangles.
Step 5: Connect to Power
For a flexible solution, connect your strips to a USB power source. If you want more brightness and stability, opt for a plug-in power adapter. For a completely hidden setup, consider hardwiring to a dedicated power supply.
Step 6: Test & Adjust
Before closing up any access panels, turn on your lights and check for even brightness, proper color temperature, and secure fittings. Make adjustments if necessary before securing everything in place.
Adding Smart Features & Enhancements
Modern LED strip systems can do far more than simply turn on and off. Add features that suit your workflow and lifestyle:
- Smart controllers: Control your lights with a phone app, remote, or voice assistant.
- Motion sensors: Have your desk light up automatically as you approach.
- Music sync: For gaming or creative spaces, link your lights to react to sound for dynamic effects.
Maintenance & Troubleshooting
Keep your desk lighting looking and performing its best with simple upkeep:
- Wipe down the profile covers regularly to prevent dust buildup.
- Check for loose wires or connectors and re-secure them.
- If brightness drops, check for damaged sections and replace them with fresh strips.
Cost & Budget Considerations
Your final cost will depend on the quality of strips, the type of profiles, and whether you DIY or hire a professional. A typical project might include:
- LED strip lights
- Mounting profiles
- Power supply
- Basic tools
For beginners on a budget, start with a small section of desk lighting to test your skills before committing to a full build.
FAQs About Recessed LED Strip Lights on a Desk
How long do LED strips last on a desk?
Quality LED strips often exceed twenty five thousand to fifty thousand hours when installed correctly. Proper heat management and a suitable power supply help maintain brightness over time and keep LED strip lights on the desk performing consistently.
Can I install LED strips without cutting into my desk?
Yes. If you prefer not to route channels, use low-profile surface-mounted profiles under the front or rear edges. You still get a clean line of light, and you can upgrade to a recessed look later.
Do I need aluminum channels for my desk LED strips?
They are highly recommended. Channels act as a heat spreader, protect the strip from bumps, and produce a smoother light line with a diffuser. They also make your installation look professionally finished.
Are RGB strips suitable for work setups?
Yes, if you select RGBW or tunable white for daytime productivity and switch to color for ambience after hours. Keep task areas in a neutral white so documents and color sensitive work remain accurate while your led strips on desk provide mood lighting in the background.
What power option should I choose for a clean desk build?
USB power is simple and flexible for short runs. A plug-in adapter suits most desks and supports higher output. A hidden, hardwired supply delivers the cleanest finish for a permanent setup.
Transform Your Desk with Recessed LED Lighting
Recessing LED strips into your desk creates a brighter and more comfortable workspace with less clutter and more style. A thoughtful plan, the right profile, and a well matched power supply will keep your lighting even, quiet, and reliable. Whether you need a focused task light for long work sessions or a soft ambient glow for gaming, a recessed setup helps your desk look and perform like a custom piece of furniture.
Ready to build your own recessed desk lighting setup and make your workspace feel new again. For layout help, product guidance, or a tailored parts list, contact us, and our team will point you to the best combination of strips, profiles, and power for your desk.


