Floating shelves should not appear dull or uninteresting; rather, they should enhance the charm of your room. However, dim lighting can make your favorite objects appear obscured.
Without the correct illumination, it’s hard to create a nice ambiance or make your area feel complete, no matter how beautiful the objects on your shelves are.
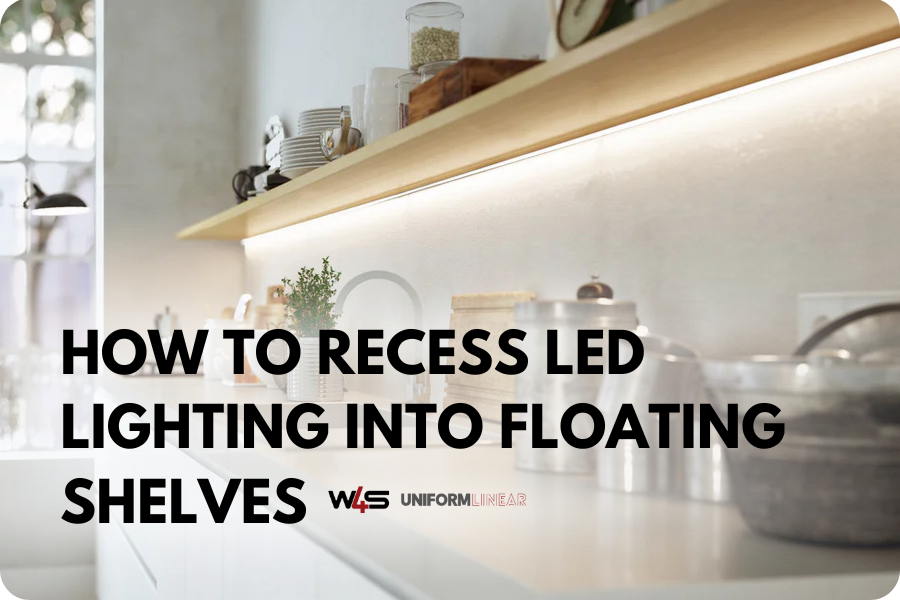
Recessed LED lighting is the answer. It adds color to your shelves and draws attention to the things that are on display. It also adds a clean and modern appearance to your house or place of business.
In this article, you’ll learn how to choose the right LEDs, install them properly, and add a polished finish to your shelves.
With just a few simple steps, you can turn dull shelves into a stylish focal point.
Table of Contents
- Plan Your Lighting Design
- Where Recessed LED Shelf Lighting is Used
- Select the Right LED Lights
- Prepare for Installation
- Cut and Install Recessed Lighting
- Connect and Power the LEDs
- Finishing Touches and Customization
- Maintenance & Troubleshooting
- Conclusion
- FAQs on Recessing LED Lighting Into Floating Shelves
Plan Your Lighting Design

Consider what you want from your recessed LED lights before making a decision. Do you want to create a serene atmosphere? Do you require increased visibility for routine tasks? Or perhaps you simply like to draw attention to your best items on the shelves?
It's easier to decide where and how to put the lights when you know what you want to achieve.
Accent Lighting
Accent lighting is the best option if you want to highlight specific items. To have the light bounce off the wall, place LED strips along the rear border of the shelf.
This produces a subtle glow that draws attention to your objects without being overly harsh or dazzling.
Task Lighting
Need better visibility on your floating shelves? Task lighting is the way to go.
It’s perfect for areas where you need bright, focused light like kitchen shelves or home office setups.
Placing LEDs under the shelves brightens the space below, making it easier to read recipes, grab essentials, or find what you’re looking for without straining your eyes.
Ambient Lighting
Want to make the space feel warm and relaxed? Soft lighting along the front or underside of the shelves adds just the right amount of warmth. It makes the room feel inviting without being too bright.
Also, think about what your shelves are made of. Wood is easy to modify, so recessing the lights is a breeze. Glass shelves work best when you attach LED strips along the edges, while metal shelves may need adhesive or clips to hold the lights securely.
Taking the time to plan ahead means your lighting will look great and fit your space perfectly.
Where Recessed LED Shelf Lighting is Used

Recessed LED lighting works well in many spaces. It adds both function and style to different settings.
Homes
Recessed LED lights work wonders in living rooms, kitchens, bedrooms, and home offices. They brighten up your space, make it easier to see, and add a warm, inviting touch.
Retail and Showrooms
In stores and showrooms, good lighting makes all the difference. Bright LED lights catch the eye and make products look more appealing, so your displays really stand out.
Restaurants and Bars
In restaurants and bars, LED lights give shelves with bottles and menus a nice glow. This kind of lighting adds warmth and makes the space feel more inviting for your guests.
Hotels and Workspaces
For hotels and workspaces, recessed LED lights keep things looking clean and professional. They brighten up lobbies, meeting rooms, and reception areas, giving your space a polished and welcoming vibe.
Select the Right LED Lights

Choosing the right LED lights can change the way your shelves look and feel. Consider these options to match your needs.
LED Strips
LED strips provide even lighting along the shelf’s length. They work well for ambient or accent lighting.
These strips are flexible and easy to install, making them a popular choice. You can place them along the edges or underneath for a subtle glow.
When recessing strips into floating shelves, you'll want to pair them with either a recessed LED channel or a recessed LED diffuser.
The Groove14 is a great channel to use with shelves.
[product=recessed-easy-mounting-led-channel-model-groove14|variants=Silver / 3m (118") - pickup only,Silver / 2m (78"),Silver / 1m (39"),Silver / 2390mm (94"),Silver / 609mm (24"),Silver / 6" Sample,Black / 3m (118") - pickup only,Black / 2m (78"),Black / 1m (39"),Black / 2390mm (94"),Black / 609mm (24"),Black / 6" Sample,White / 3m (118") - pickup only,White / 2m (78"),White / 1m (39"),White / 2390mm (94"),White / 609mm (24"),White / 6" Sample,Raw / 3m (118") - pickup only,Raw / 2m (78"),Raw / 1m (39"),Raw / 2390mm (94"),Raw / 609mm (24"),Raw / 6" Sample]
[/product]
Otherwise, the Arles is a great recessed diffuser.
[product=arles-led-strip-flexible-diffuser]
[/product]
You can find more LED channels for shelves here.
Puck Lights
Puck lights create spot illumination. They are perfect for highlighting specific areas and are great for task lighting.
These lights work best for showcasing decor or illuminating workspaces. They are easy to mount and provide focused lighting exactly where you need it.
Recessed Fixtures
Recessed fixtures fit smoothly into the shelf. This option gives a clean, built-in appearance. They are ideal for creating a polished look while keeping the lighting subtle. Since they sit flush with the surface, they prevent clutter and maintain a streamlined design.
Choose the right color temperature to set the mood. Warm white (2700K–3000K) adds an inviting feel, while cool white (4000K) gives a more modern touch.
For added convenience, explore dimmable options, motion sensors, or smart controls. These features allow you to customize the lighting experience for any setting.
Prepare for Installation

A smooth installation starts with proper preparation. Taking a few extra steps now saves time later and ensures the lights work properly.
Gather Tools
Get all the necessary tools before you begin. You’ll need a drill, router, saw, wire connectors, and a measuring tape.
Double-check that everything is in good working order. Having everything ready makes the process easier and avoids last-minute delays.
Ensure Safety
Safety should be your top priority. Turn off the power before starting any work to avoid accidents.
Protect the surfaces where you’ll be working by using drop cloths or padding. This keeps your shelves and surrounding areas free from scratches or damage.
Plan the Power Source
Decide how you’ll power the lights. Plug-in lights are easy to set up. Battery-powered options offer flexibility. Meanwhile, hardwired lights provide a permanent setup but require more effort. Choose what works best for your space.
Click here for more help selecting a PSU.
Cut and Install Recessed Lighting
Accuracy is key for a clean and polished finish.
Mark and Measure
Mark the spots carefully to ensure even spacing. Consistency keeps the shelves looking balanced and professional. Double-check measurements before cutting to avoid mistakes.
Create Recesses
Use a router or saw to carve shallow grooves for the LEDs. This step helps the lights sit flush with the surface.
Take your time to avoid cutting too deep. Double-check the depth to ensure a snug fit for the lights.
Secure the Lights
Attach the LEDs using adhesive, brackets, or recessed grooves. Press firmly to ensure they stay in place. A secure fit prevents shifting and keeps the lights looking neat.
Most LEDs come with adhesive on the backside of the strip.
Connect and Power the LEDs
Good wiring keeps your setup working smoothly.
Choose the Best Wiring Method
Decide between hidden wiring, USB power, or a direct wall connection. Each option offers different advantages depending on your space. For a clean look, hidden wiring works best.
Conceal Wires
Hide wires using built-in channels, under-shelf covers, or cable clips. This prevents clutter and maintains a polished appearance. Taking time to conceal wires properly makes the setup look more professional.
Test Placement and Brightness
Check the light’s position and brightness before securing. Small adjustments can make a big difference. Testing beforehand saves time and effort later.
Finishing Touches and Customization

Add a polished look with thoughtful customization.
Seal and Smooth Cut Areas
If you’ve cut grooves or channels to recess the LED lights, the edges can be rough or uneven. Sanding and sealing these cut areas prevents splinters and gives the shelves a smooth, clean finish.
Taking a few extra minutes for this step ensures a professional result and a polished appearance.
Adjust Brightness Levels
Set the right mood with dimmable controls. You can create a cozy atmosphere for relaxing, or increase brightness for tasks that require more light. Adjusting the brightness makes the space more functional and visually appealing.
Integrate Smart Controls
Schedule automatic on/off times or use motion sensors for energy efficiency. These smart features provide convenience, making it easy to control the lights.
Over time, this setup helps reduce energy use and keeps your space well-lit without extra effort.
Maintenance & Troubleshooting
Keep your LED lighting looking great and working smoothly with a little regular care.
Clean LEDs Regularly
Dust and grime can build up over time, making your lights look dimmer. Giving the surface a quick wipe now and then helps maintain that consistent glow.
It’s a small step that goes a long way in keeping your shelves looking fresh.
Fix Dimming or Flickering
Noticed your lights dimming or flickering? It’s usually a sign of loose connections or lower-quality LEDs. Checking the wiring early can save you from bigger headaches later.
When the problem doesn’t go away, swapping out faulty components can bring back steady, reliable lighting.
Upgrade Older LEDs
Over time, LEDs can lose their brightness and efficiency. If your shelves aren’t looking as sharp as they used to, it might be time for an upgrade.
Newer models not only brighten things up but also use less energy, giving you better lighting and lower bills.
Conclusion
Recessed LED lighting does more than just brighten up your shelves. It brings warmth to your space, draws attention to your favorite pieces, and makes it easier to see what you need.
Upgrading your shelves with this simple project adds lasting style and practical benefits. So, why wait? Give your shelves a fresh, modern look and enjoy the difference every day!
FAQs on Recessing LED Lighting Into Floating Shelves
How do you add recessed LED lights to floating shelves?
Measure and mark the desired spots. Use a router or saw to carve shallow grooves, then secure the LEDs using adhesive or brackets.
What is the best type of LED for recessed shelf lighting?
LED strips provide consistent ambient lighting, while puck lights work best for highlighting specific areas.
How do you hide wires when installing recessed LEDs in shelves?
Use built-in channels, under-shelf covers, or cable management clips to conceal wires for a clean finish.
Can you dim recessed LED lights on shelves?
Yes, dimmable LED lights let you adjust brightness to match the mood or task.
Do recessed LED lights get too hot for wooden shelves?
No, quality LEDs stay cool, making them safe for wood and other materials.
How do you maintain recessed LED shelf lighting?
Regularly clean the LEDs and check for loose connections to ensure consistent performance.


