Bad lighting can ruin a good meal. Harsh overhead lights make everything feel cold and uninviting. Similarly, dim lighting leaves you squinting at your plate. Either way, it’s hard to enjoy dinner when the mood feels off.
Trying to fix it by switching between bright and dim settings doesn’t help. Bright lights are too intense for cozy family dinners.
Dim lights make it hard to have lively conversations during gatherings. It’s frustrating when you can’t get the lighting just right.
Recessed LED lighting changes everything. It adds a soft, warm glow that makes your dining space feel inviting.
The best part? You can adjust the brightness and color to match any occasion.
In this article, you’ll learn how to choose the best recessed LED lights, plan your setup, and create a dining space that looks amazing and feels just right.
Table of Contents
- Plan Your Lighting Design
- Where Recessed LED Lighting Works Best
- Select the Right LED Lights
- Prepare for Installation
- Cut and Install Recessed Lighting
- Connect and Power the LEDs
- Finishing Touches and Customization
- Maintenance and Troubleshooting
- Enjoy a Modern, Inviting Dining Space
- FAQs About Adding Recessed Lighting to Your Dining Table
Plan Your Lighting Design

Before installing recessed LED lighting, consider how you want your dining space to feel. Different meals and events call for different types of lighting.
A cozy family dinner feels more inviting with a soft, warm glow. In contrast, a lively gathering benefits from brighter, focused light that keeps the mood upbeat. This is where dimmable LED strips come in handy. They allow you to switch between settings effortlessly to match the occasion.
For even more control, opt for a CCT strip. It lets you adjust the color temperature to set the perfect mood. Warm light creates a relaxing atmosphere for intimate dinners, while cool light adds brightness and energy to lively events.
Define Your Lighting Purpose
Think about what kind of lighting you need. Do you want:
Ambient Lighting: A soft, inviting glow that sets a relaxed mood.
Task Lighting: Bright, focused light for eating, reading, or doing activities at the table.
Accent Lighting: Decorative highlights that add a modern, stylish touch.
Dimmable LEDs give you the flexibility to switch between these options. For even more control, CCT strips let you adjust the warmth or coolness of the light, so your dining space always feels just right.
Choose the Right Placement
Where you place the lights makes a huge difference. You can:
Outline the Table’s Edges: Create a soft, elegant border glow.
Install Them Underneath: Add a cool floating effect that gives your table a modern feel.
Recess Them into the Surface: Achieve a clean, sleek look that blends perfectly with the table.
Consider Your Table Material
Your table’s material affects how you install the lights. Wooden tables are easy to modify, making them perfect for recessed LEDs.
Glass or metal tables require alternative mounting options. Adhesive strips or surface-mounted channels work best for these materials. They still give you a stylish, polished look.
Planning your lighting design carefully ensures that your dining space feels warm, welcoming, and perfect for any occasion.
Where Recessed LED Lighting Works Best

Recessed LED table lighting isn’t just for homes. It adds style and function to a variety of spaces, making them more inviting and practical.
Homes
It’s perfect for dining rooms, kitchen islands, and outdoor patio tables. You can create a warm, cozy glow for family dinners or brighten the space for larger gatherings. Dimmable options let you switch between moods effortlessly.
Restaurants and Cafes
Soft, ambient lighting makes these spaces feel more inviting. It creates a cozy atmosphere that keeps customers comfortable and encourages them to stay longer. Plus, it highlights the decor, adding charm to the space.
Hotels and Event Venues
Recessed LEDs add elegance to banquet tables and private dining areas. They set the right mood for events, making the space feel more sophisticated. You can easily adjust the brightness to match formal dinners or lively celebrations.
Offices and Co-working Spaces
Stylish yet functional, recessed LED lights improve the look and feel of shared work tables. Good lighting enhances productivity and keeps the space looking modern. You can create a balance between focused task lighting and a relaxed ambiance.
Select the Right LED Lights
Choosing the right type of LED lights makes your dining table look stunning. It also ensures that the space functions perfectly. The right lights can enhance the atmosphere and make every meal feel special.
LED Strip Lights for Even Illumination
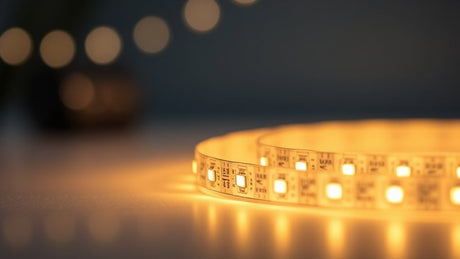
Recessed LED strips provide smooth, even lighting. They eliminate harsh shadows and give your table a polished look.
When placed in LED channels, they create a sleek, flush finish. This design blends seamlessly with your table, adding both style and function.
Brightness and Color Temperature
The right brightness and color temperature set the mood. For a warm, cozy atmosphere, go with Warm White (2700K–3000K). It’s perfect for family dinners or relaxed evenings.
On the other hand, if you want a crisp, modern vibe, Cool White (4000K) works best. It adds brightness and a clean look to your space.
Extra Features to Consider
Once you’ve chosen your LED lights, consider adding extra features to enhance your setup. Dimmable settings let you adjust the brightness to match any occasion, creating the perfect atmosphere.
Meanwhile, remote control options make it easy to change settings without leaving your seat, adding convenience.
For the ultimate hands-free experience, smart integration allows you to control the lights through apps or voice commands, giving you complete control over your dining space.
You can even mount the ProxiBox from Blebox under your table for some extra wow factor! With this smart little controller, you can control the lighting by waving your hand over your table, above the ProxiBox below. It'll almost be like a magic trick that'll astonish visitors and kids every time!
[product=proxibox-for-proximity-control-wi-fi-motion-switch-sensor]
[/product]
Prepare for Installation

Gathering the right tools and setting up a safe workspace makes installation easier and safer. Taking a few minutes to prepare ensures a smooth process.
Tools You’ll Need
To get started, have these tools ready:
• A drill to create mounting holes.
• A saw or router to make space for recessed lights in wooden tables.
• Adhesive or mounting brackets to secure the LED strips.
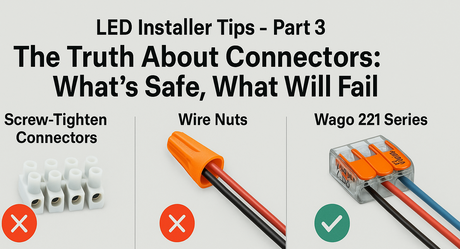
• Wire connectors for safe and reliable electrical connections.
• A measuring tape to ensure accurate placement.
Prioritize Safety
Safety should always come first. Turning off all power sources prevents electrical hazards and protects both you and your workspace.
Protect the table’s surface during the cutting process. Adding padding or covers helps avoid accidental damage.
Plan Your Wiring
Once your workspace is safe, decide which power source works best. Plug-in power is simple and flexible, making it easy to set up and adjust.
Battery-powered options work well for tables without nearby outlets. They’re convenient but may need regular recharging.
For a clean, professional look, a hardwired setup is a great choice. It’s permanent and eliminates visible wires, giving your space a polished finish.
Cut and Install Recessed Lighting

Cut and Install Recessed Lighting
A proper installation keeps the LEDs secure and gives your table a polished, professional look. Taking your time during this step ensures the best results.
You can use either a recessed LED channel or a recessed diffuser. LED channels are aluminum housings for strip lighting, which will help with heat dissipation, ensuring your strip lives a full life. These also have compatible diffusers that click into place for smooth lighting. The Begtin12 is a good example of a recessed LED channel.
[product=0-47-small-recessed-led-channel-model-begtin12|variants=Silver / 2m (78"),Silver / 1m (39"),Silver / 609mm (24"),Silver / 2390mm (94"),Silver / 3m (118") - pickup only,Silver / 6" Sample,Raw / 2m (78"),Raw / 1m (39"),Raw / 609mm (24"),Raw / 2390mm (94"),Raw / 3m (118") - pickup only,Raw / 6" Sample,White / 2m (78"),White / 1m (39"),White / 609mm (24"),White / 2390mm (94"),White / 3m (118") - pickup only,White / 6" Sample,Black / 2m (78"),Black / 1m (39"),Black / 609mm (24"),Black / 2390mm (94"),Black / 3m (118") - pickup only,Black / 6" Sample]
[/product]
Recessed diffusers are lengths of opaque silicon that simply fit into a routed groove. The Lille is a good example.
[product=flexible-rubber-diffusers-for]
[/product]
Mark and Cut Installation Points
Start by measuring carefully. Mark symmetrical points along the table to keep the lighting balanced.
For wooden tables, use a router to cut precise grooves. Take your time and avoid rushing to prevent damage.
Hiring a professional is a smart choice when dealing with high-end or delicate surfaces. Mistakes can be costly, so expert help ensures a clean and polished outcome.
Secure LEDs for a Clean Finish
Once the grooves are ready, it’s time to secure the LEDs.
Adhesive strips provide a polished look and hold the lights firmly in place. They create a clean appearance and keep the LEDs aligned.
For extra stability, especially on uneven surfaces, small screws or brackets add support. This ensures the LEDs stay secure over time.
Recessing the LEDs into the surface enhances the modern look. It also protects the lights from accidental bumps or movement.
We recommend a dimmable tunable white LED strip for this step. This way, you'll be able to change between warm lighting and bright white lighting or anything in between. Also, being dimmable, you'll be able to adjust the brightness. A good example of this is the Optimum Harmony Series.
[product=high-cri-tunable-white-ip20-led-strip-24v-optimum-harmony-series]
[/product]
To control it, you'll also need something like the Blebox 5 Channel.
[product=wlightbox-smallest-wireless-wi-fi-rgbw-led-controller]
[/product]
Connect and Power the LEDs
A clean power setup keeps your table looking stylish without messy wires. Choosing the right power source and hiding wires properly makes all the difference.
Choose the Right Power Source
Pick a power option that suits your setup.
USB or outlet connections are convenient and easy to install. They work well for tables near a power source.
Rechargeable batteries offer a wireless solution, keeping the space clutter-free. They’re perfect for tables without nearby outlets.
A power tool battery adapter is another great option. It charges quickly and plugs into the LED strip easily. This option keeps trailing wires out of sight, giving your table a cleaner look.
[product=power-tool-battery-adapter-for-led-strip-lights]
[/product]
Hide Wires for a Clean Look
Once the power source is set, focus on hiding the wires.
Use discreet channels along the table’s edges to keep wires out of sight.
For a more polished finish, under-table covers can conceal the wiring completely. This keeps everything tidy while maintaining a stylish, modern appearance.
Finishing Touches and Customization
Add the final touches to perfect your dining table lighting. Small details make a big difference in creating a polished and inviting space.
Seal and Smooth Cut Edges
Ensure that all cut areas are smoothed and sealed for a professional finish. First, sand down any rough edges to prevent splinters or uneven surfaces. Then, apply a sealant to protect the table and maintain a clean, polished look.
Adjust Brightness for Different Occasions
Brighten the lights for lively family dinners, and dim them for quiet, intimate evenings. Additionally, use a dimmable switch or remote to make adjustments easy. You may experiment with different settings to find the perfect glow for every occasion.
Add Smart Controls for Convenience
Use smart home systems to control lighting remotely and enhance energy efficiency. Moreover, connect your lights to voice-activated assistants for hands-free control. Set schedules to automatically adjust brightness based on the time of day.
Maintenance and Troubleshooting
Keeping your LEDs in top condition ensures long-lasting performance. Regular care helps maintain their brightness and functionality.
Clean LEDs Regularly
Dust and dirt can reduce brightness, so clean them gently to maintain their glow. Use a soft, dry cloth or a microfiber duster to avoid damaging the surface. For stubborn grime, lightly dampen the cloth and wipe carefully.
Fix Flickering or Dimming
When you notice flickering, check the connections and power sources. Loose wires or faulty adapters are often the cause. Reconnect any loose ends and replace damaged parts to restore smooth lighting.
Upgrade for Better Performance
Consider upgrading to newer LED models with improved efficiency and additional features. Modern LEDs offer better brightness, longer lifespans, and smart controls. Upgrading helps keep your lighting system up to date and working efficiently.
Enjoy a Modern, Inviting Dining Space
Recessed LED lighting adds both style and function to your dining area. Turn up the brightness for energetic gatherings or dial it down for a more intimate, relaxed setting. From family dinners and business meetings to cozy date nights, the right lighting creates the perfect mood.
Ready to give your table a fresh new look? Dive into your DIY project and transform your space today. Need expert guidance? Explore our LED channels and accessories or reach out for professional advice and installation.
FAQs About Adding Recessed Lighting to Your Dining Table
Is recessed lighting a good option for a dining room?
Yes, it creates a clean, modern look and adds adjustable brightness. It also highlights the table without overwhelming the space.
What type of lighting works best over a dining table?
LED strip lights provide even illumination and a stylish finish. They are energy-efficient and long-lasting.
How do you install recessed lighting on a dining table?
Measure, cut grooves, secure the lights, and connect the power. Make sure the lights sit flush for a polished look.
Can recessed LED lights be dimmed for different moods?
Yes, most recessed LEDs offer dimmable settings for flexibility. You can easily adjust the brightness with a remote or smart control.
How do you hide wires when adding recessed lighting?
Use channels or covers to keep wires out of sight. This maintains a clean and organized appearance.
