Selecting the right LED channel for drywall is key to achieving visual appeal and functional efficiency. The right choice enhances design and protects LED strips from damage. It also ensures proper light diffusion.
A well-chosen channel improves durability and heat dissipation. It also boosts long-term performance.
In this guide, you'll learn about different drywall LED channels. You'll discover key factors to consider, installation requirements, and tips for making the best choice.
Table of Contents
- Understanding LED Channels for Drywall
- Types of Drywall Channels
- Key Factors to Consider
- LED Strip Compatibility
- Installation Requirements
- Cost & Budget Considerations
- Best Applications for Each Channel Type
- Final Tips for Making the Right Choice
- FAQs: How to Choose the Right LED Channel for Drywall
Understanding LED Channels for Drywall

LED channels give strip lights a clean, professional look. They also help with heat dissipation, which extends their lifespan. By improving the lighting effect, they make your space look polished and well-lit.
Drywall LED channels are always recessed. They have side wings that get plastered over, creating a seamless finish. This allows them to blend effortlessly with the surrounding surface.
These channels come in different materials, usually aluminum or plastic. They also offer various finishes, such as matte, glossy, or textured. You can easily find one that matches your style.
Types of Drywall Channels

Drywall LED channels serve different functions depending on where they are installed. Choosing the right type depends on the lighting effect you want to achieve and the architectural requirements of the space.
Some channels are designed to provide soft, indirect lighting, while others create a bold, modern look with a more defined light output.
The right choice can highlight specific areas, improve ambiance, or add a decorative touch to your space.
Ceiling Drywall Channels
These channels are embedded directly into the ceiling, creating a sleek and modern lighting effect. They allow you to install continuous lines of light that enhance the architectural design of a room.
You’ll often see these used in living rooms, offices, and commercial spaces where a minimalist yet stylish look is needed. Since they are recessed into the drywall, the final result is a seamless, built-in appearance.
Proper planning is essential when installing ceiling drywall channels. You’ll need to consider wiring, placement, and how the light interacts with the rest of the space. A high-quality diffuser can also help create an even, soft glow instead of harsh lighting.
Cove Lighting Channels

Cove lighting channels are ideal for indirect lighting. They are placed in recessed areas along ceilings or walls, directing light upward or sideways for a soft, ambient effect. This type of lighting adds depth, warmth, and a luxurious feel to any space.
They work well in bedrooms, hotel lobbies, restaurants, and anywhere you want a cozy atmosphere. These channels help eliminate harsh shadows, making the space feel more inviting.
You can install cove lighting channels in different shapes and sizes. This depends on the room’s layout. Since the light source is hidden, only a smooth glow is visible. It enhances the design without drawing attention to the fixture.
Tray Ceiling Channels

Designed for tray ceilings, these channels highlight layered ceiling structures with soft, indirect lighting. They create a sophisticated effect that works well in living rooms, dining areas, and offices.
By placing LED strips within these channels, you can add depth and dimension to your ceiling. The diffused light enhances the architectural details without creating glare.
Tray ceiling channels are a great way to make a space feel more open and elegant. They work especially well when paired with dimmable LED strips, allowing you to adjust the brightness to match different moods or occasions.
Ceiling Perimeter Channels
These channels run along the edges of ceilings to create a floating ceiling effect. They are commonly used in modern interiors where soft, indirect lighting enhances the overall design.
Ceiling perimeter channels help define the shape of a room while making the ceiling appear lighter and more spacious. They provide a gentle glow that reduces harsh shadows, making the space feel more balanced.
These channels are often used in hotels, offices, and contemporary homes. When installed correctly, they add a sleek, upscale look without making the lighting too overpowering.
Indirect Lighting Channels
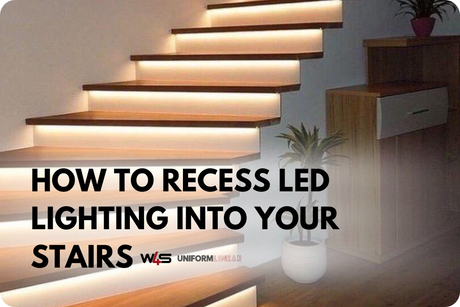
Indirect lighting channels offer a practical and stylish solution for areas that need subtle illumination. These channels are placed behind architectural elements like wall panels, floating shelves, or staircases.
Instead of direct exposure, the light reflects off nearby surfaces, creating a soft and diffused glow. This method works well in bedrooms, hallways, and accent walls where you want a warm, inviting atmosphere.
Indirect lighting channels are perfect for adding depth and highlighting design details without visible fixtures. They can also be used to enhance safety by providing low-level lighting in dark areas like stairwells or walkways.
Key Factors to Consider

Aesthetic Goals
Do you want your LED channel to blend in or stand out? Drywall channels create a seamless look, sitting flush with the surface for a smooth, modern finish.
They work well in spaces where you want the lighting to feel like part of the architecture rather than an added feature.
For a more defined look, LED channels can highlight specific architectural elements. Placing them around tray ceilings, along walls, or within recessed spaces adds depth and style to your design. The right placement transforms a basic setup into a striking feature.
Installation Complexity
Drywall LED channels take more effort to install than surface-mounted ones. Since they need to be recessed and plastered in, planning ahead will help you get a smooth, seamless finish.
If you're working with existing drywall, you'll need to cut precise grooves to fit the channels. They have to be secured properly before plastering to ensure they sit flush. For new builds or renovations, installing them before finishing the drywall can save you extra work later.
You can install them yourself if you have experience with drywall modifications. But even a small mistake can be hard to fix, so hiring a professional might be worth it for a clean, polished result.
Choosing the Right Diffuser for Drywall Channels
The diffuser affects how light is distributed. A frosted diffuser softens the glow and minimizes harsh shadows, making it perfect for ambient lighting in living spaces.
A clear diffuser provides a sharper, more defined light, which works well for accent lighting or work areas. Some diffusers also have prismatic designs to evenly spread the light across a surface.
Selecting the right diffuser ensures your drywall LED channels create the right mood and functionality in your space
Material & Durability

Most drywall LED channels are made from aluminum, ensuring durability and efficient heat dissipation. This helps extend the life of your LED strips and keeps the system running smoothly over time.
Plastic options are more budget-friendly, but they may not last long, especially in high-heat areas. For a durable setup with a premium look, aluminum channels are the best choice.
LED Strip Compatibility
Your LED strips need to fit snugly inside the channel. If the channel is too wide, the strips may shift, affecting the lighting. If it's too narrow, installation becomes difficult.
Always check the width and depth of both the strip and the channel before buying.
The type of diffuser also affects the final look. A frosted diffuser softens the light, while a clear one keeps it sharp. If you want even light distribution without visible dots, go for a deeper channel with a high-quality diffuser.
Installation Requirements
Having the right tools makes installation easier. You’ll need a measuring tape, saw, drill, and adhesive to secure the channel in place. If you’re cutting into drywall, plan carefully to avoid mistakes.
Wiring is another key factor. Make sure you have enough space to hide the cables neatly. Proper ventilation also helps prevent overheating, which extends the lifespan of your LED strips.
Taking the time to install everything correctly ensures better performance and a clean, professional look.
Cost & Budget Considerations
LED channels vary in price based on material, size, and design. Drywall channels typically cost more than surface-mounted options because they require more installation work. However, they provide a seamless, high-end look that can enhance your space.
Balancing cost and quality is important. Cheaper plastic channels may save money upfront, but aluminum options last longer and offer better heat dissipation. Investing in durable materials ensures your lighting setup stays in great shape for years.
Also, consider installation costs. If you’re hiring a professional, factor in labor expenses. A well-installed drywall LED channel not only looks better but also saves you from costly repairs down the line.
Best Applications for Each Channel Type
Ceiling drywall channels

Perfect for modern spaces. They create clean, seamless lighting in homes and businesses. Great for open areas where you want a sleek, continuous glow.
Cove lighting channels
Best for soft, indirect lighting. They add warmth to living rooms, hotels, and restaurants. Install them in recessed spaces for a floating light effect.
Tray ceiling channels
Ideal for decorative ceilings. They add depth and dimension to layered designs. Perfect for dining areas and lounges that need an elegant touch.
Ceiling perimeter channels

Great for a floating ceiling effect. They create a soft halo of light along the edges. A stylish choice for contemporary and minimalist spaces.
Indirect lighting channels
Perfect for subtle accent lighting. Use them behind shelves, wall panels, or staircases. They add a cozy, sophisticated glow without visible fixtures.
Final Tips for Making the Right Choice
Start by thinking about your space and the lighting effect you want. For a modern look, choose recessed drywall channels. For a bold statement, pick channels that highlight key features.
Next, consider installation. Drywall channels take more effort but offer a seamless finish. If you're not confident with DIY, hiring a professional can save time and hassle.
Quality matters. A well-made LED channel lasts longer and keeps lighting even. Cheap materials may cause flickering and wear out quickly.
Maintenance is important too. Choose a design that’s easy to clean and allows simple LED strip replacement. Planning ahead prevents future issues.
FAQs: How to Choose the Right LED Channel for Drywall
What’s the difference between silicone and aluminum LED channels?
Silicone channels are flexible and great for curved surfaces. Aluminum channels are rigid, durable, and help with heat dissipation, making them ideal for long-term use.
How do I choose a drywall LED channel?
Think about where you’ll install it and the look you want. Recessed drywall channels create a seamless finish, unlike surface-mounted channels, which are easier to install. Also, make sure your channel fits your LED strip width.
Can you cut LED drywall channels?
Yes, you can cut drywall channels to fit your space. Use a saw for aluminum channels and sharp scissors or a knife for silicone ones.
Do LED diffusers affect brightness?
Yes, they do. A clear diffuser keeps the light bright and sharp, while a frosted one softens it for a more diffused glow.


