Installing LED lighting underneath kitchen cabinets is the ideal way to enhance the beauty of your new kitchen and at the same time, good lighting will make it more enjoyable to work in.
Step into the future of kitchen illumination with our revolutionary high quality under cabinet lighting solutions. Say goodbye to dim, shadowy corners and welcome the brilliance of LED lights for under cabinets in kitchen that will utterly transform your culinary haven.
Tired of struggling through poorly lit food prep? Fed up with searching for ingredients in the shadows? Our cutting-edge LED strip lights for under cabinets in the kitchen are here to eliminate darkness, ensuring every inch of your countertop radiates with an intense brightness that dares the shadows to even try and linger.
Create Your Own Custom Under Counter Lights
Seize control and conquer your lighting setup with the ultimate power of personalization. Unleash your inner designer by effortlessly installing under counter lighting that aligns with your vision.
It's time to dominate your space, one light at a time, by crafting a masterpiece through the art of installing under counter lighting. It is not as difficult to design your own under-counter LED lighting as you may think!
These are the basic components that you will need:
Step 1: Pick the color LED strip lights that you want
We offer a comprehensive range of LED tape lights, including plain white LED strip, color temperature adjustable (CCT) white strip, single color LED strip as well as RGB and RGB+W tape light.
Read our LED strip technical buyers guide and learn about LED color temperature. Then browse our range of LED strip light to choose the right one for your kitchen cabinets led lighting.
Step 2: Pick an LED channel profile as a housing for your LED strip
We offer a range to top quality aluminum LED profiles made in Europe. Choose whether you want to use a surface mount LED channel, recessed LED lights, or a corner mount LED profile for your kitchen.
Read our blog to learn how to cut LED channels and covers yourself.
Step 3: Pick an appropriate LED power supply
You need to match your power supply to the power requirements of the LED strip you will be using.
Read our tips on choosing an LED power supply and then choose the one for your job from our range of quality LED drivers.
Step 4: Pick an LED dimmer or controller
This step is optional for single color strips, but a controller is required for any color adjustable LED strip. Even for single color LED strip, using a dimmer is highly recommended to give you full control over the end result.
We offer a range of dimmers and controllers which offer wireless control for your LED lights straight from your smartphone.
Example project walk-through
The basic specifications and obstacles for this project were:
- CCT (color temperature adjustable) lighting - The client wants the option of adjusting the light to be cool daylight light in the morning but have a soft warm white light in the evening
- Marble countertops - The lighting needs to be diffused to hide unwanted reflection hot spots
- LED shelf lighting - Floating shelves with LED strip lights on the underside need to be aesthetically pleasing as the lighting will be exposed to full view
- Surface mount profile - Cabinets are already in place, so cutting for recessed lighting will not be possible
- Remote control - The client wants to control the lighting via remote and therefore needs wireless control for their under cabinet lighting
Products we recommend for this project:
- Slim8 or Begton12 surface mount profiles, or Cabi12 corner profile
- Sunrise series adjustable white LED strip
- Meanwell LRS 24V power supply
- Casambi 4-ch wireless LED controller with Bluetooth
Where Kitchen Lighting Shines Brightest
In the realm of modern kitchen design, LED kitchen lighting shines brightest, illuminating every corner with efficiency and style. From the dining room to the under-cabinet spaces, LED fixtures bring a world of possibilities.
For subtle yet sophisticated touches, puck light delicately accentuate prized kitchenware and treasured decor, while accent lighting casts a warm glow on key focal points, creating an inviting ambiance.
Under cabinet LED lighting serves as a practical solution, offering both task lighting for meal preparation and an elegant underglow that elevates the overall atmosphere. Light bars, with their versatile designs, ensure even distribution of brightness, making countertops a breeze to work on.
Moreover, flush mount fixtures effortlessly integrate with ceiling fans, providing a cool breeze and ample illumination in one. With their energy-efficient brilliance and diverse range of applications, LED kitchen lighting truly outshines the competition, turning any under cabinet lights kitchen into a radiant and functional space.
How to Choose the LED Best Kitchen Lighting
When seeking the best LED lights for the kitchen, careful attention must be paid to the functionality of the light fixtures. Begin by determining whether you require functional, task-oriented lighting or prefer a more ambient lighting setup. Accurate measurements of your kitchen space are essential to identify the appropriate size of the light fixtures that will fit harmoniously.
Consider critical sizing dimensions of LED kitchen lights such as height, width, depth, and weight during your selection process. Additionally, opt for kitchen lighting colors and finishes that complement the existing furniture and decorative elements in the room to achieve a cohesive aesthetic. For efficient workspace illumination, consider LED under cabinet lighting or under counter lighting options.
If you have any queries about the featured LED kitchen lighting fixtures, feel free to contact our knowledgeable lighting experts at (865) 339-4956 for personalized assistance.
Why Choose LED Strip Lights for Under Kitchen Cabinets
Looking for the best way to enhance your kitchen's ambiance and functionality? These remarkable lighting solutions offer a multitude of benefits that set them apart from other types of lamps. One of their primary advantages is their exceptional efficiency and energy-saving capabilities. In today's eco-conscious world, LED strip lights align perfectly with the green movement, representing a significant stride in energy-efficient lighting technology.
Furthermore, these lights emit minimal heat, ensuring a comfortable cooking experience even during extended culinary endeavors. The issue of overheating often associated with traditional lighting is elegantly sidestepped by LED strip lights, adding an extra layer of convenience to your kitchen environment.
When it comes to durability, LED lights in kitchen cabinets once again take the lead. With a significantly longer service life compared to their conventional counterparts, these lights prove to be a cost-effective choice that eliminates the hassle of frequent replacements.
Ease of installation is another compelling reason to choose LED strip lights for under cabinet lighting. Armed with 3M super glue, these lights can be effortlessly affixed to your cabinets, eliminating any installation-related complications.
But the advantages for using LED kitchen strip lights under cabinet don't stop there. LED light strips under cabinet offer the unique advantage of adjustability. Unlike many other lighting options, these strips can be customized to suit your preferences. From adjusting the brightness to altering the color to match your mood or the weather outside, LED tape light for under cabinet provide a versatile lighting solution that caters to your every need, allowing you to indulge in your DIY spirit.
So, if you're seeking to transform your kitchen's illumination and aesthetics, LED undercabinet lighting is the way to go. Whether you're looking for the best under cabinet lights, cabinet top lighting, or LED lights within your kitchen cabinets, consider exploring the world of Under Cabinet Lighting.
Installing Under Counter Lighting in the Kitchen
Here's a simple guide that will show you how to choose the right kitchen under cabinet lighting for different things you do in the kitchen.
1. Mark the Shape of the New Electrical Box
- Turn off the power to the kitchen from the main electrical panel. Verify power is off by using a radio or lamp in the intended outlet, ensuring it remains silent or unlit when turned on.
- Unscrew the wall plate and disconnect wires from the receptacle and remove it from the electrical box.
- Check how the box is fixed to the wall—nailed to a wall stud on one side. Peek between the box and drywall to identify the attachment side.
- Position the new electrical box by holding a two-gang, old-work electrical box over the existing box.
2. Remove the Old Electrical Box
- Remove any screws or fasteners holding the old box in place.
- Carefully disconnect any wires from the old box.
- Gently pull out and remove the old electrical box.
- Once you've made the hole larger, ensure that the cable entering the electrical box is not tightly secured. Then, utilize a flat pry bar to carefully extract it.
3. Extend the Cable Length
- Plan the route for the new cable so it reaches from the power source to the new box.
- Create a pathway for the cable using suitable tools, like drilling holes or using wire channels.
- Thread the new cable along the pathway, ensuring it's secured and hidden.
4. Install the Lighting Fixture
- Take off the cover and the metal strip that holds the bulbs from the light fixture. This will give you space to work.
- Hold the fixture against the bottom of the cabinet and slide it forward until it's out of sight behind the front edge of the cabinet.
- Use the provided screws to attach the fixture securely to the cabinet.
- Use a slotted screwdriver to gently remove the round knockout plug from the back of the light fixture.
- Check that the fixture is level and aligned properly.
5. Attach the Cable Connector
- Connect a cable connector to the knockout hole on the new electrical box and protect it from the fixture's sharp edges.
- This will create a safe entry point for the cable to enter the box.
- Strip off about 6 inches of the outer plastic covering from the cable's end.
- Thread the cable through the connector.
- Use screws to tighten the connector, ensuring it grips the cable's plastic covering and not the individual wires.
6. Install the New Electrical Box
- Install a new two-gang electrical box near the hole in the backsplash.
- Thread the existing cable from the receptacle and the cable from the light fixture into the box.
- Insert the box into the hole and secure it by tightening the screws, causing plastic fins to grip the drywall.
- Test the box's fins before installation.
- Slide the new electrical box into the marked outline.
- Secure the box in position using screws or fasteners.
7. Set Up a GFCI Outlet
- Connect the bare copper grounding wires from the existing and new cables using a green pigtail connector.
- From the remaining cable, separate the white wire and cut two 8-inch-long pieces. Strip ½ inch of insulation from their ends and connect them to the white wires in the box using a wire connector.
- Attach one end of an 8-inch white wire to the silver GFCI screw terminal labeled "white-wire line." Cut two 8-inch-long black wires, strip ½ inch of insulation, and join them to the black wire from the existing cable.
- Fasten one free end to the "hot-wire line" GFCI terminal. Loop the pigtail around the green grounding screw on the GFCI, leaving at least 4 inches of wire beyond the screw.
- Remove the plastic sheathing from the remaining purchased cable, separate the white wire, and cut two 8-inch-long pieces.
- Strip ½ inch of insulation from their ends using wire strippers and connect them to the white wires in the box using a wire connector.
- Remember to twist wires together using lineman's pliers before securing with wire connectors.
8. Connect the New Dimmer Switch
- Connect the 8-inch black wire to the dimmer switch's black wire using a wire connector. Join the dimmer's yellow wire to the black wire from the newly installed light fixture.
- Use a wire connector to link the bare copper ground wire from the GFCI to the dimmer's green grounding wire.
- Connect the last white wire to the dimmer's white wire using a wire connector
- Neatly fold the extra wires into the box and secure both the GFCI and dimmer switch using the supplied screws. Note that for LED lighting, ensure the switch is specifically designed for LED use.
9. Finalize the Fixture and Wall Plate
- Reinstall the socket strip in the fixture without inserting bulbs yet.
- Connect the white, black, and green wires within the fixture to the corresponding wires of the same color from the cable using wire connectors (white to white, black to black, and bare copper to green).
- After wiring, insert bulbs into the socket strip and attach the fixture cover. Secure the two-gang wall plate. Restore power and test the setup.
- Review all connections and confirm they are securely tightened.
- Remember not to touch halogen bulbs with bare hands to prevent damage due to skin oils and excessive heat.
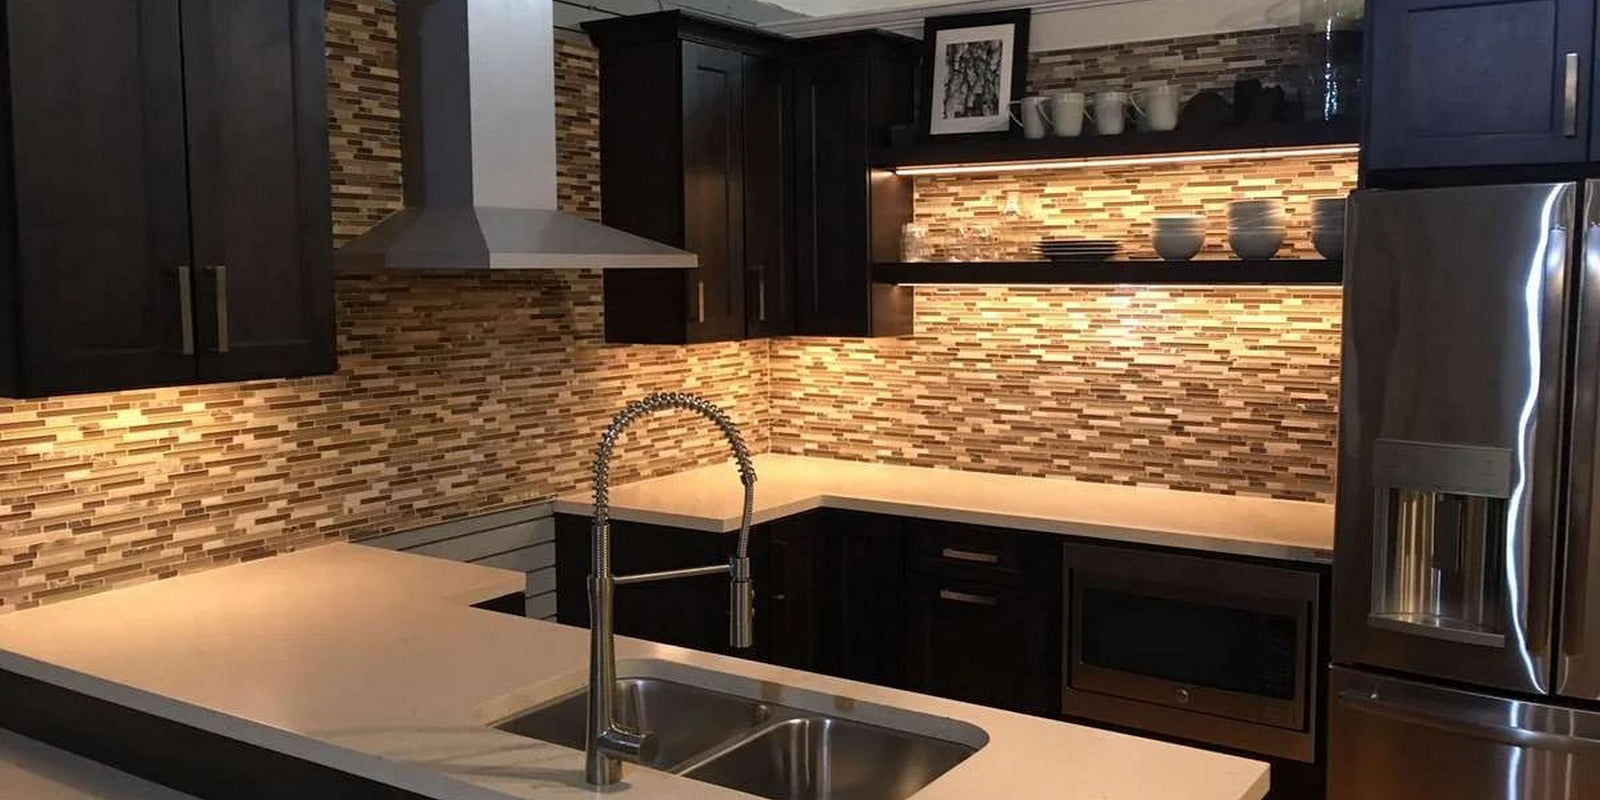
The results
Before...

...and after!


CCT demonstration
View this post on Instagram
Frequently asked questions
Q: How can I control the brightness of my under counter LED lights?
A: Our wireless controllers can be controlled from your smartphone (with the free app) or with a compatible wireless keypad.
Q: What can I do to avoid hot spots (visible LED pixels) on highly reflective surfaces?
A: Use a high-density LED strip so that the pixels are close together, combined with frosted opal diffuser as the profile cover. Ideally, a deeper profile section also helps because it increases the distance between the LED strip and the diffuser. Alternatively, you can use COB LED strip which is effectively dot-free but we do not currently offer this in a CCT version.
Q: Don't under counter lights get hot?
A: LED lighting is a very efficient and generates much less heat than other forms of lighting. Along with this, the aluminum LED housing helps to dissipate the heat that is generated.
Q: If have tried off-the-shelf LED strip lights before and they got very dim after only a year or two. Can this be avoided?
A: Unfortunately most consumer LED strip is very poor quality targeting low prices only. Our LED tapes are all commercial grade LED strip manufactured in Europe from top quality components.
Q: Help! I don't really know what I need.
A: Not a problem, our sales team is experienced and ready to help. Contact us with your requirements and we will help you out.
Q: Do under cabinet lights use a lot of electricity?
A: No, under cabinet lights typically do not use a lot of electricity. LED under cabinet lights are especially energy-efficient and consume minimal power compared to traditional lighting options.
Q: What is the best brightness for LED lights in kitchen?
A: The best brightness for LED strip lighting under kitchen cabinets typically falls within the range of 400 to 800 lumens with a recommended LED color temperature of around 2,700-5,000 K.
Q: What is the best light for inside cabinet lighting?
A: The best light for inside cabinet lighting is LED light strips. They offer energy efficiency, minimal heat emission, and easy adjustability, making them ideal for illuminating cabinet spaces effectively.
Let us help you
Contact our sales team today to discuss your kitchen lighting project.


