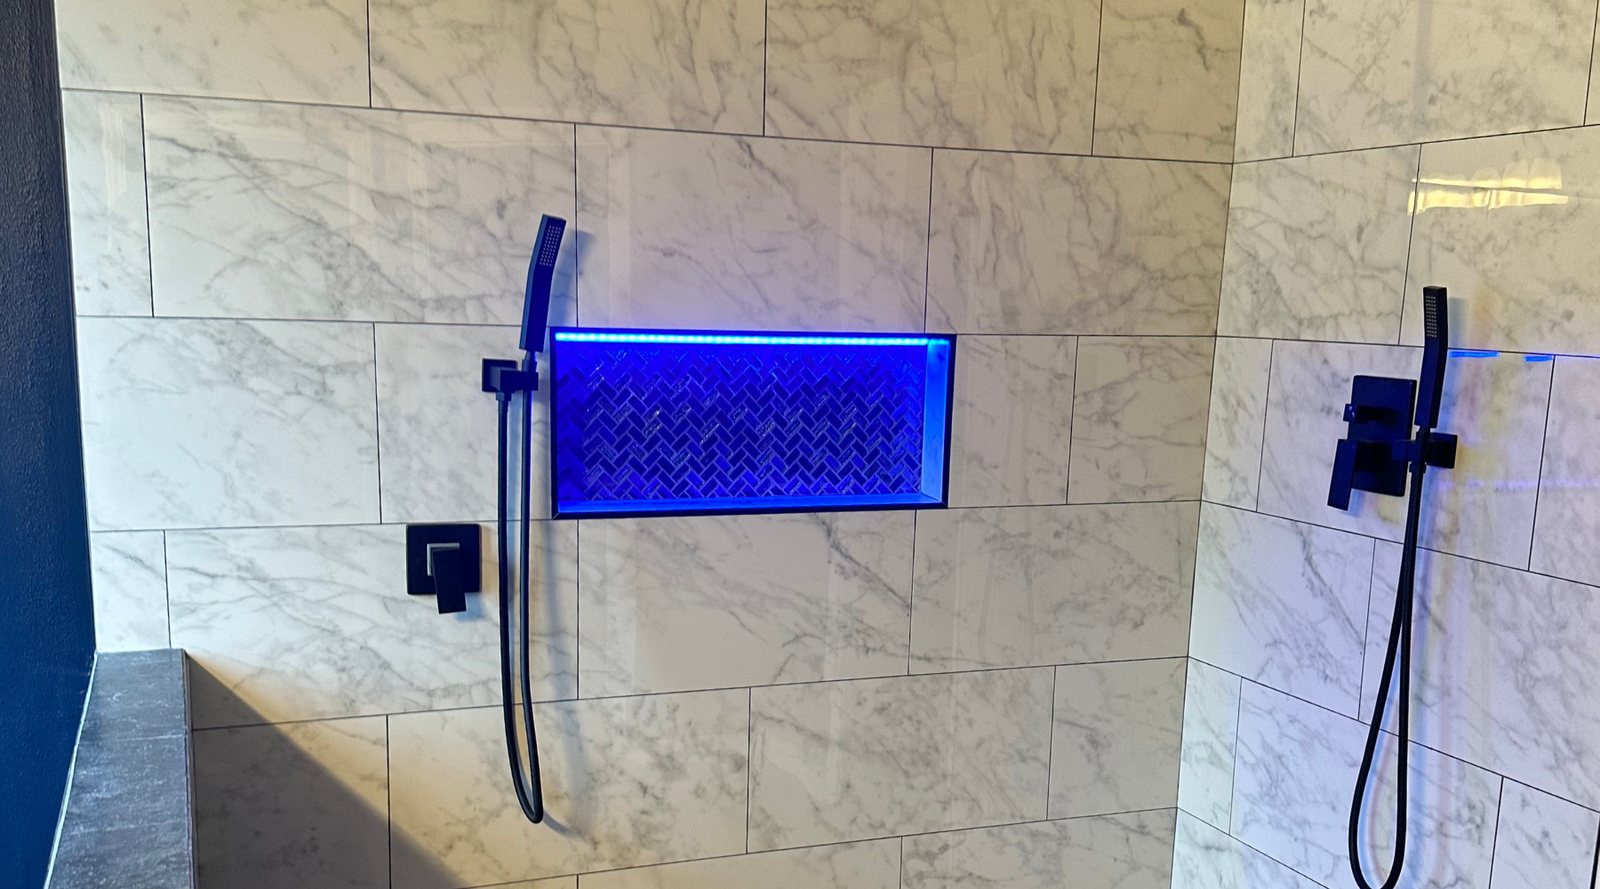
How to Install Waterproof LED Lighting in a Shower Niche – A Complete Guide
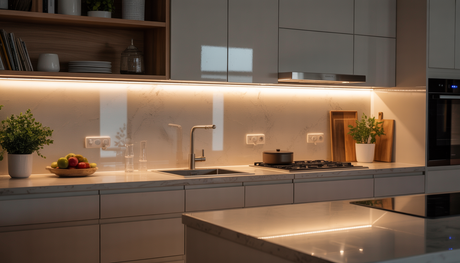
Planning a modern bathroom upgrade or custom shower remodel? Adding a waterproof LED-lit niche is one of the cleanest, most luxurious features you can include. At Wired4Signs USA, we’ve designed hundreds of lighting kits and systems tailored to elevate your shower design.
Choosing the right materials for installing an LED shower niche can seem complicated—but it doesn’t have to be. In this guide, we’ll walk you through three setup options, all the essential components you’ll need, installation tips, and direct links to each product to help you create a sleek, durable, and functional illuminated shower niche.
What do I need for shower niche lighting?
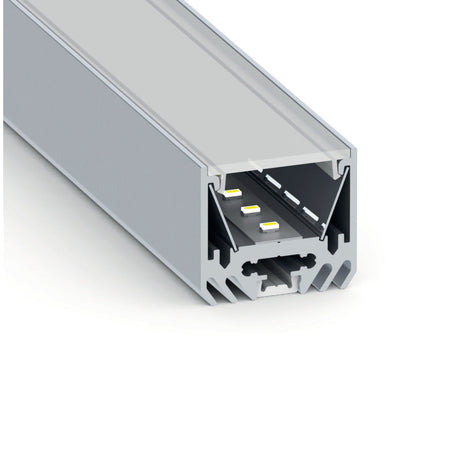
1. Aluminum LED Channel: We offer a variety of LED channels for shower niches, but the most popular one is the Model Uni-Tile12 180Deg. It's incredibly easy to install and gives you an elegant, stylish finish. For quick installations, consider our Nicho Series Clip-In Kit, which requires no diffuser or silicone.
2. Covers/Diffusers: Opal or clear covers are highly recommended for your shower niches. They serve a dual purpose - protecting the LED strip and creating a soft, accentuated lighting effect by diffusing the light evenly. (Please note: this is not required for Nicho kits.)
3. End caps: Available in pairs or pack of 10 pairs, you can buy them here: End Cap for Uni-Tile12 Profile. They stop tile grout going into the channel during the installation, and any dust later on. If you seal them with silicone, they also help keep water out of the fixture. This helps keep the LED strip clean, dry, and safe. Also, they give a neat and finished look to your shower niche lighting.
4. Waterproof LED Strips: Here are the three Waterproof LED strip options that work best for shower niches. They provide even lighting without any dark spots:
- IP67 Waterproof COB White Light: White Lily Series
- IP67 Waterproof COB RGB Light: Black Cherry Frost Series
- Nicho Pre-Encapsulated Kit: Available in white or RGB versions, clips in directly with no sealing needed.
5. Power Supply:
- Use the Meanwell LPV model if you plan to connect your LED lights (either white or RGB) to a smart controller or a regular ON/OFF wall switch. You can also use the Magnetron-XRD 24V for both RGB and white strips—it's smart-controller compatible.
- Use the Magnitude MinDrive 60 if you intend to connect your lights to a wall switch dimmer (Note: This is suitable for white LED strips only; RGB strips should NOT be connected to a wall switch dimmer).
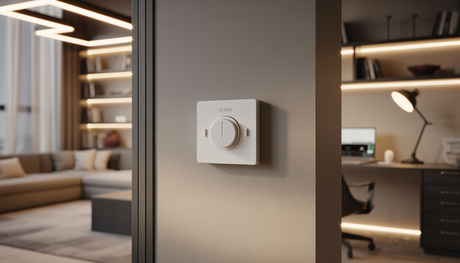
6. Smart Controller: These are necessary for RGB lights and optional for white lights. They allow you to change colors, create scenes, dim the lights, and more, all from your phone or tablet. We have two popular options:
7. Wire: Use UL 2-Core 18AWG wire for white LED strips and UL 4-Core 20AWG wire for RGB setups. These high-quality wires ensure safe, efficient power delivery and reliable performance in wet environments.
8. Silicone Sealant: After cutting the LED strip to your desired size, make sure to use silicone to prevent any water from getting inside the protective coat that comes with our waterproof LED channel or any areas where water could get in. You can use our Waterproofing LED sealant to keep everything dry and secure.
Optional:
Pre-wired & sealed soldering services for a plug-and-play setup.

Option 1: Classic White LED Strip + Channel Build
This flexible and fully customizable setup is our most popular option for builders and designers.
What You Need:
- LED Channel: Unitile LED Channel
-
Waterproof LED Strip: White Lily Series COB IP67 LED Strip
Available in: 2700K, 3000K, 4000K, 5000K, 6500K - Wire: UL 2-Core 18AWG White PVC Wire
- Driver: Magnetron-XRD 24V Super Compact Driver
- Sealant: Permatex RTV Silicone Adhesive
- Optional: Soldering Services (Pre-Wired & Sealed)
Best for: Clean, minimalist white light in modern bathrooms.
Option 2: RGB Color-Changing System
Want to add ambiance and smart control? This RGB LED niche lighting setup lets you change colors and effects with a controller.
What You Need:
- LED Channel: Unitile LED Channel
-
RGB LED Strip: Black Cherry Frost RGB COB IP67 LED Strip (24V)
Color Options: Full RGB color spectrum (no fixed Kelvin) - Controller: Explore RGB Controllers
- Wire: 4-core RGB Wire
- Driver: Magnetron-XRD 24V Driver
- Sealant: Permatex RTV Silicone Adhesive
- Optional: Soldering Services
Tip: RGB setups must include a controller to adjust brightness, color, and effects.
Option 3: NEW Nicho Series Clip-In Kit
Our easiest and fastest option — no diffuser or silicone sealing required.
What You Need:
-
White Version: White Nicho Tile Edge Light Kit
Available in: 3000K, 4000K, 6000K -
RGB Version: RGB Nicho Tile Edge Light Kit
Color Options: Full RGB spectrum via controller - Driver: EnoLED XRD Series 24V Driver
- Controller (for RGB): RGB Controller Options
Why Nicho?
- Pre-encapsulated LED strip – clips directly into the channel
- No diffuser or silicone required
- Quick and clean installation
How to install shower niche lighting?
Follow these steps to ensure a clean, professional, and waterproof installation of your LED-lit shower niche:
- Location and Size: Start by deciding on the location and size of your shower niche. Make sure there’s enough space and consider how the lighting will highlight the niche.
- Power Source: Ensure there's a suitable power source nearby to ensure convenient electrical access for the LED lights.
- Prepare the Niche: If you're building a custom niche, frame and waterproof it with the right materials to ensure long-lasting durability and water resistance.
- Cut and Attach LED Strips: Measure the dimensions of your niche precisely. Carefully cut the LED strip lights to fit along the inside edges of the niche. Attach them securely at the top of the shower niche.
- Connect to Driver: Use heat shrink to waterproof the connections when connecting the LED strips to the LED driver or transformer.
- Test Lights: Before finalizing the installation, activate the LED lights to verify proper functionality. Confirm that they emit the desired level of illumination and there are no issues with the connections.
Final touches:
- Seal the edges and corners of the shower niche with silicone sealant to keep water out.
- Make any necessary adjustments or touch-ups to the tile and grout.
- Check for any visible wiring or components, making sure they are properly concealed and securely tucked away.
Installation Tips
- Seal all soldered joints and connectors with Permatex RTV for moisture protection
- Route wiring to a dry, accessible location for the driver
- For RGB setups, test the controller before closing walls or tiling
- Use our soldering service to make your install plug-and-play
By following all these steps, you'll surely install your shower niche lighting perfectly, achieving a professional and visually appealing result. To learn more about shower niche lighting, you can visit our shower niche lighting collection.
Ready to Build Your LED Niche?
We ship directly from the U.S., and our expert team is happy to help you choose the right parts for your project.
Shop All LED Niche Components: https://www.wired4signsusa.com
Questions? Contact our team