Wired4Signs USA has one of the largest ranges of LED drywall channels on the market. We work together with four of the top European plaster-in aluminum LED channel manufacturers, so we are always ahead and up to date with the latest trends in the industry.
This article aims to guide you step-by-step through the process of selecting your plaster in LED strip light profile and selecting the suitable LED strip and dimming system where required.
Design objectives
A) What is the desired width of your concealed light strip?
In other words, what is the width of the lighting diffuser that you would like to see once your plaster in track lighting installation is complete.
We have a range of plaster-in aluminum LED channels ranging from 10mm (0.39") to 70mm (2.76") wide.
Use the filter options in our LED channel selector to explore the options: LED Channel Profiles — Drywall/Ceiling + Mud-in
B) Depth constraints for your plaster in profile

Another factor to consider is whether the area behind your plaster-in trimless aluminum LED channel will include any obstructions such as studs or joists, etc.?
We have LED drywall reveals that are designed to be shallow enough to avoid interfering with the support structure of your wall when using, for example, 1/2" drywall. However, if you choose a shallow LED drywall wall channel, it is recommended that you use an LED strip with a higher population to avoid hot spots and maintain a smooth, homogeneous finish. For example, our 120 or 180 LED/meter White Iris range is appropriate for low-profile applications.
The Hide10 or Vario30-04 in-wall LED strip profiles are some examples of our shallow profiles.
C) Desired functionality of your lighting
Is the concept for your LED drywall lighting to produce functional lighting or to offer feature or mood lighting?
If your LED channel drywall lighting is intended to produce trimless functional or primary lighting, you will need to consider the following:

- Beam angle - A broader drywall LED strip channel will allow for a greater spread of light. Achieving functional lighting with a very narrow drywall LED channel will be challenging depending on room size.
- Reflector Plates - Some of our LED drywall channels have the optional accessory of highly polished reflector plates which can be inserted into the profile to achieve 15-25% higher light output. RSL15 US, RPL35 US, RPL55 US, RPL70 US and Vario30-05 are examples of drywall LED channels that include this option.
- LED diffusers - Here you must remember that the more opaque (whiter) the lens, the lower the light output. Opal lenses can cut the light output by up to 50 percent, but the flip side is that it makes it much easier to achieve a dot-free homogeneous finish. We have written another blog demonstrating the different kinds of diffusers available and their effect on light output: read our PL55 diffuser comparison test to learn more.
- Choosing LED strip - We offer you a comprehensive range of LED strips made in the USA or Europe. One factor to consider when selecting the LED strip for your project, is to take into account the maximum wattage rating of the plaster-in LED channel that you have chosen. The wattage rating is essential for the heat management of your LED strip and will preserve its life span and prevent overheating of your installation. We have several high-output white LED, RGB and RGBW ranges to choose from by using the filter feature on our LED Strip selector. Browse our full range of LED strips, or take a look at these examples of high output white LED strips such as our White Iris 180 LED strip, Sunrise Series white color adjustable strip, or Hibiscus Series RGB + White strip. Read our Kelvin rating color temperature blog for more guidance on choosing your white LED strip colors and our LED strip buyers' guide for general technical information about choosing LED strips.

On the other hand, if the purpose of your plaster-in LED strip installation is for trimless feature or complementary lighting, then you will need to consider all of the above points, but especially note the following:
- Homogeneous finish - A dot-free finish is more important for feature lighting so more attention should be placed on this aspect. Frosted opal diffusers and our White Lily COB continuous LED strip will help you achieve this look even on very shallow LED drywall channels.
- Low power LED strip - Complementary lighting requires a lower light output which means that you can uses lower power LED strip. The reduced current draw means that fewer drivers and control gear will be required, reducing your outlay and wiring requirements. Our Decor Series ambient LED strip is ideal for accent lighting in features such as illuminated ceiling coves and baseboards.
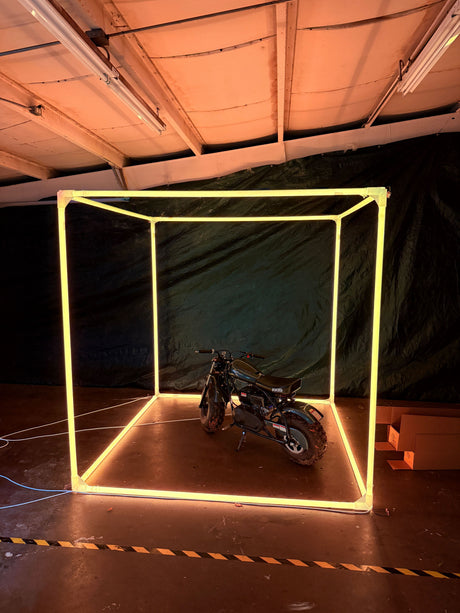
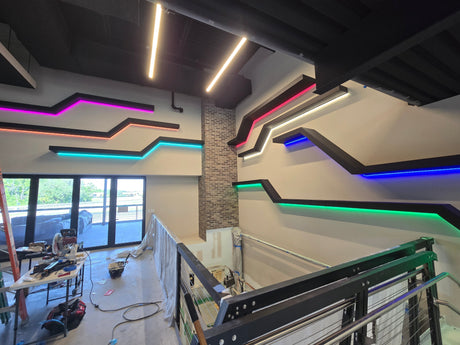
- Geometric shaped lights - Special light shapes such as squares, rectangles, hexagons can be designed by using LED drywall channels which support various angled connector accessories. For example, our Vario30-05 profile includes corner elements with angles ranging from 60 to 135 degrees.
- Ceiling-to-wall feature lighting - You can achieve continuous linear light lines which extend from ceiling to wall surfaces by using a drywall LED channel. By utilizing an aluminum cutting blade, LED drywall channel can be mitered or cut to length. To see how to cut aluminum profiles, read our blog about cutting techniques. Some of our drywall profiles such as Vario30-05 include perpendicular corner accessories which eliminate the need for cutting tricky miters - simply make a square cut to length and assemble the corner for a perfect finish!
- Seamless long runs - When installing continuous long linear light lines, joints or seams are preferably to be avoided as much as possible, and for this most of our plaster in LED profiles are available lengths up to 3m (10ft) either as standard or on request. Further to this, diffusers for some of our profiles - such as the C9 Click cover for Vario30-04 and Vario30-05 - are available in coiled lengths of 4m (13ft), allowing us to cost effectively ship you the drywall channels in 2m (6.56ft) length while still achieving completely seamless long light lines.
D) Choosing the correct power supply and controller

We supply and support a comprehensive range of commercial-grade LED power supplies and LED controllers for LED strip lights for ceiling flush installs. Here we list a few of the most common methods used for powering drywall LED strip lights:
- Non-dimmable LED strip channel drywall installation - This is where you want to be able to simply switch the LED drywall installation on/off without any dimming or control. As a rule of thumb and depending on the wattage rating of the LED strip, we do not recommend running more than 10 meters of the LED strip in a single series run without adding additional supply wiring. This avoids brightness gradients which are caused by voltage drops on long runs. If the installation does not require dimming, you can select any of our constant-voltage led drivers, such as the HLG range or the VLM range. Note the wattage per meter and operating voltage of your LED strip before selecting your LED driver. For example, if the LED strip is 12.8W/m at 24V and your installation requires 3m (10ft) of strip, your calculation will be as follows: 3 x 12.8W plus a safety factor (10-15%) = 44W. Therefore you would require an LED driver equal or larger than 44W, such as a 60W 24V LED driver.
- Using an existing wall or Leviton AC type dimmer - The above power and circuit length considerations still apply, but the most important thing about using your existing AC dimmer is to ensure that it has a suitable power (wattage) rating for your installation and that you use a Magnitude mains dimmable power supply. For effective operation, the dimmer rating should preferably be in the range of 70-80% of the planned load. For example, if your installation uses 40W of LED strip, but your dimmer is rated a 200W, then your dimmer switch will be overpowered and not dim the installation properly.
-
Multi-zone, Color control, Phone app, and Wireless dimming for your drywall LED lighting project - When using dimming controllers for dimming or color tuning effects, you will still require a suitably rated driver to power the installation. For longer installations, you will need to use an amplifier/repeater such as the ampBox to power additional lighting segments and prevent inconsistent lighting. We offer controllers from two LED control ecosystems:
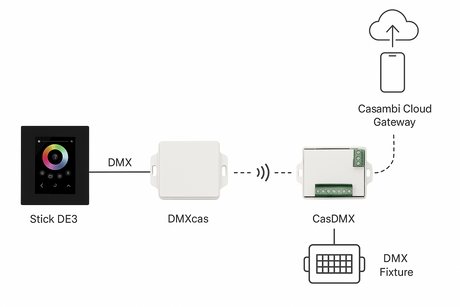
- Casambi Bluetooth System - The Casambi controller is a tiny Bluetooth mesh network device which is connected between your standard LED driver and your drywall LED strip itself. The Casambi controllers are part of an ecosystem that allows you to add sensors, switches, etc., to your installation. The Casambi system also has an easy-to-use phone app to set up and control your lighting. No Wi-Fi network or gateway is required to operate the Casambi system, but an internet gateway is available for applications that require it.
- Blebox Wi-Fi System - The Blebox system provides LED controllers, switches, etc. You can control your lighting over a Wi-Fi network via a phone app as well as Blebox switches and sensors.
Let us help you
For more information and support, do not hesitate to reach out to us. Contact us today on our contact page or at info@w4susa.com
