Installing LED light strips in your ceiling can dramatically enhance the aesthetics and functionality of your space. These lights are more than just a modern trend—they are energy-efficient, versatile, and provide unique lighting effects that can transform any room.
Whether you’re aiming to create a cozy atmosphere with accent lighting, provide focused task lighting, or achieve a sophisticated ambient glow, LED ceiling lights offer an excellent solution.
This guide will walk you through the step-by-step process of installing LED light strips, offering professional tips and techniques to ensure your installation is smooth, safe, and successful.
Benefits of Installing LED Light Strips in Your Ceiling
Before we dive into the installation process, let's take a closer look at why LED ceiling light strips are such a great choice. Here are some of the primary benefits:
Energy Efficiency

LED lights consume significantly less energy than traditional incandescent bulbs. According to the U.S. Department of Energy, LED bulbs use at least 75% less energy and last 25 times longer than traditional incandescent lighting. This efficiency translates into lower electricity bills and a longer lifespan for your lighting system.
Longevity
LED strip lights are known for their long lifespan. While traditional bulbs may need replacing every year or so, LED lights can last up to 25,000 hours or more with proper use. This means fewer replacements, lower maintenance costs, and a more reliable lighting setup.
Versatility
LED light strips can be used in a wide variety of settings. Whether it's to highlight architectural features, create mood lighting, or provide task lighting in kitchens, offices, or studios, LED strips can be adapted to different environments and needs. Additionally, they come in a range of colors and sizes to suit any project.
Sleek Aesthetics
LED strips can be mounted discreetly along ceilings, walls, or coves, providing a clean, modern look that enhances any interior design. Whether you’re going for a minimalist, contemporary, or even a rustic vibe, the versatility in design and the unobtrusive nature of LED strips can complement any style.
Customization
Many LED light strips offer customizable color options and remote-controlled features, allowing you to adjust the lighting based on your mood or the time of day. For instance, you can dim the lights for a cozy evening or switch to bright daylight for working.

Planning Your LED Ceiling Light Installation
Before you begin installing LED light strips, planning is key to ensuring the best results. Proper planning not only makes installation easier but also guarantees a professional-looking finish. Here are the steps to take before starting:
Measure Your Space
Measure the area where you want to install the LED strips. Precision in measuring will help you choose the right length of strips and avoid wastage. Be sure to measure both the length and the width of the installation area (i.e., the perimeter of the room or the specific areas where you want to install the lights).
Select the Right LED Strips
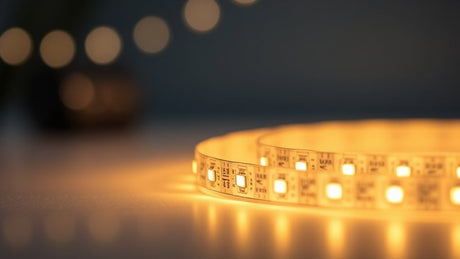
There are different types of LED strips, and selecting the right one is crucial. Some are designed for accent lighting, while others are meant for task or ambient lighting. Here are a few types of LED strips you might encounter:
- Standard LED strips: These are the most common and are available in various brightness levels and colors.
- RGB LED strips: These strips allow for color-changing options, which can be controlled via remote or app.
- High CRI (Color Rendering Index) LED strips: If you’re installing lights in areas where color accuracy is important (such as art studios or makeup rooms), these strips produce light that mimics natural sunlight.
Decide on Placement
Think about the ambiance you want to create. Do you want the light strips to be hidden within coves for a soft, indirect glow? Or do you prefer them to be more visible for a striking effect? Your choice of placement will significantly affect the overall look of the space.
Choose the Power Supply
LED light strips require a constant power source. The power supply needs to match the voltage and wattage requirements of the strips you’ve chosen.
Be sure to calculate the total power consumption to ensure you select an appropriately rated power supply.

Installation Process
Let’s talk about the actual installation process and the things you have to look out for to achieve the best outputs:
Using LED Channels for a Professional Finish
LED channels are a game-changer when it comes to ceiling light strip installations. These channels not only protect your light strips but also improve their aesthetics and longevity. The LED strips are placed inside these channels, which help with heat dissipation, creating a polished and clean finish.
Benefits of LED Channels:
- Improved Aesthetic Appeal: LED channels hide the wires and strips, providing a seamless, professional look.
- Heat Management: As LEDs generate heat during operation, LED channels help dissipate this heat, ensuring the lights last longer.
- Even Light Distribution: Channels diffuse the light more evenly, reducing the harshness of direct LED light spots.
- Protection from Dust and Moisture: These channels protect the LEDs from external damage, such as dust accumulation, moisture, and physical impacts.
Preparing Your Ceiling
Every ceiling type has specific requirements, and adapting your installation to your ceiling's unique characteristics ensures that the LED strips will function effectively and look great. Below are tips tailored to different ceiling designs:
Installation Guides by Ceiling Type
Every ceiling type has its own nuances, let’s dig deeper on how we can properly install LED light strips in specific ceiling types.
Drywall Ceilings
Drywall ceilings are common in many homes. Here’s how to install LED strips on drywall ceilings:
- Preparation: Start by cleaning the ceiling surface. Use a dry cloth to remove any dust or debris. If you’re using adhesive strips, ensure the surface is completely dry and smooth.
- Marking: Use a tape measure to determine where you want to place the LED strips. Mark the points lightly with a pencil to guide your installation.
- Mounting: Attach the LED channels (if using) or the light strips directly to the ceiling using adhesive tape. Press firmly for a secure bond.
Drop Ceilings
Drop ceilings, also known as suspended ceilings, have a grid framework that makes it easy to attach LED strips. Here’s how:
- Mounting: For ease of installation, use clips or adhesive tape to mount the LED strips to the grid. Ensure the strips run along the grid lines for a neat appearance.
- Power Access: Drop ceilings often have easy access to power outlets and wiring, making it straightforward to connect your strips.
Coves and Valances

Installing LED strips in coves or behind valances offers a beautiful and elegant way to light a room. This hidden installation technique provides a soft glow without exposing the light strips.
- Placement: Position the LED strips inside the cove or behind the valance. Be sure to aim the light upwards or towards the wall to achieve an indirect lighting effect.
- Pro Tip: If your room has high ceilings, place the strips in areas that will reflect light off the ceiling for a more diffused glow.
Ceilings with Beams and Rafters
If your ceiling features beams or rafters, you can use these architectural elements to enhance the lighting design.
- Method: Place LED strips along the beams or between the rafters to create a rustic or industrial feel. Ensure the power cables are securely taped or concealed to maintain a clean look.
Slat Wall Ceilings
For homes or offices with slat wall ceilings, installing LED strips between the slats can create a modern, linear look.
- Technique: Use flexible LED strips that can bend along the lines of the slats. These strips provide uniform lighting while enhancing the contemporary aesthetic of the space.
Barrel Vaulted Ceilings
Barrel vaulted ceilings present a unique challenge due to their curvature.
- Installation: Choose flexible LED strips that can easily conform to the shape of the ceiling. The flexibility of these strips allows them to follow the curves seamlessly.
- Conceal Wiring: Make sure to hide all wiring and connectors for a clean and professional finish

Additional Mounting Options
If you’re looking for different mounting methods, consider these two alternatives:
Surface-mounted LED Strips
Surface mounting involves attaching the LED strips directly to the surface of the ceiling, making installation fast and simple. However, this method might not offer the sleek aesthetic of recessed lighting.
Suspended LED Strips
Suspended lighting, where LED strips hang down from the ceiling, is ideal for rooms with higher ceilings. This method creates a more dramatic, industrial effect and can be used as a statement piece in large spaces.
Installation Tips for a Professional Look
Achieving a polished, professional look requires careful attention to detail. Here are some tips to help you along the way:
- Measure Twice, Cut Once: Precision is essential for a clean, professional installation. Ensure you double-check your measurements before cutting or adhering to the LED strips.
- Test the Setup: Before committing to the final installation, test the strips by connecting them to the power supply and ensuring they work properly.
- Use Quality Adhesives: High-quality mounting adhesives ensure that your LED strips stay in place long-term without falling off or peeling.
- Secure Connections: Use electrical tape to secure connectors and wiring to avoid loose connections and to keep your installation safe.
- Turn Off Power Before Work: Always turn off the power to the area you’re working on to prevent electrical accidents.
- Conceal Wires: A professional-looking installation hides all visible wires. Use cord covers or channels to protect and conceal the power cables.
Final Thoughts
Installing LED light strips on your ceiling is a fantastic way to elevate your home's lighting design while reaping the benefits of energy efficiency and long-lasting illumination. Whether you’re a DIY enthusiast or hiring a professional, this step-by-step guide equips you with the knowledge you need to achieve stunning results.
With careful planning, the right materials, and attention to detail, you can create a space that is well-lit, aesthetically pleasing, and comfortable for years to come.
Frequently Asked Questions (FAQs)
How do I power my LED light strips for ceiling installation?
To power your LED strips, you’ll need a suitable power supply that matches the voltage and wattage requirements of the strips you have purchased. Most LED strips operate on 12V or 24V systems, but it’s essential to check the specifications of your particular product to ensure compatibility.
You can connect the strips to an electrical outlet via a transformer, and if you're installing multiple strips, make sure your power supply can handle the combined wattage.
Can LED light strips be installed on any ceiling type?
Yes, LED light strips can be installed on most ceiling types, including drywall, drop ceilings, and even slat wall or vaulted ceilings. The installation method may vary depending on the type of ceiling, so it's important to plan your installation according to the unique features of the ceiling in your space.
For example, drop ceilings often make it easy to hide cables and install strips along the grid, while vaulted ceilings may require more flexible LED strips to contour along the curves.
Can I install LED strips myself, or do I need a professional?
LED strip installation can often be a DIY project, especially if you’re familiar with basic electrical work. Many LED strips come with adhesive backing, making them easy to mount.
However, if you are not comfortable working with electrical components or don’t want to risk damaging your ceiling or the light strips, it may be a good idea to hire a professional installer. Professionals can also offer advice on the best placement, lighting effects, and how to properly manage power supplies.


